
Desserts
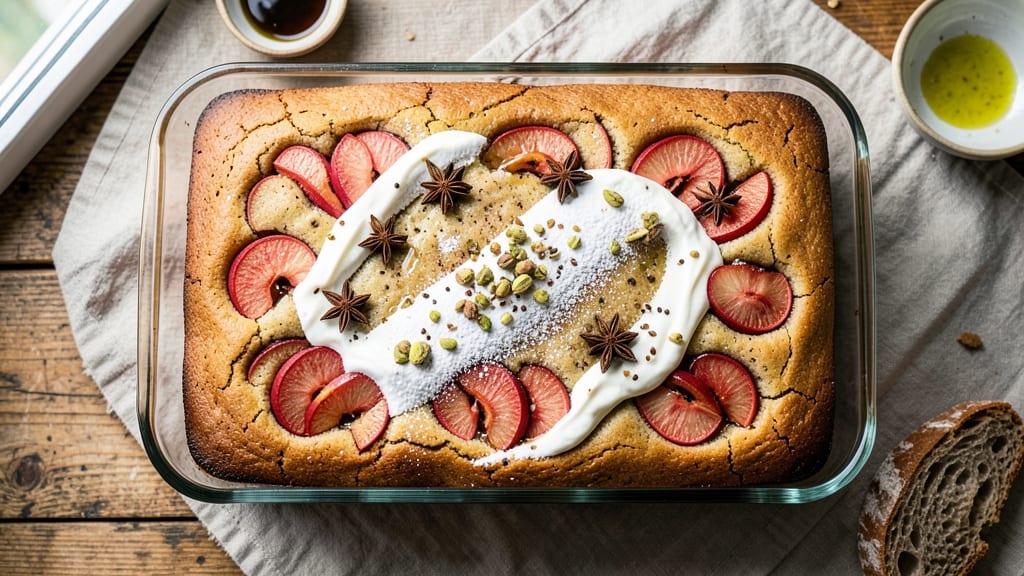
This apple cake tray bake delivers spiced warmth and buttery moistness in every slice—perfect for a cozy dessert that requires no fancy pans or complicated techniques. 🍏 The secret lies in a simple batter that transforms into a tender, caramelized cake with just the right amount of cinnamon and nutmeg to complement the sweet apples.
I developed this recipe after years of testing tray bakes, ensuring it turns out perfectly every time without requiring a cake pan.
The beauty of this method is its simplicity: mix the ingredients, pour into a greased tray, and bake until golden. The apples soften into a luscious filling while the cake edges develop a subtle caramelization, creating a balance of textures that keeps every bite satisfying.
Unlike traditional apple cakes, this version stays moist for days, making it ideal for meal prep or serving fresh.
What sets this recipe apart is how it combines the comfort of a classic apple cake with the convenience of a tray bake. No layers to worry about, no frosting to fuss with—just a single, buttery moist cake that's perfect for sharing or enjoying solo.
The spices infuse throughout, creating warmth that pairs beautifully with a dollop of whipped cream or a scoop of vanilla ice cream.
Whether you're baking for a family gathering or treating yourself to a simple dessert, this apple cake tray bake delivers restaurant-quality results with minimal effort. The recipe scales easily, so you can adjust the size of your tray to fit your needs without sacrificing texture or flavor. Ready to bake?
Ingredients for apple cake tray bake
Simple ingredients that transform into a moist, spiced apple cake with caramelized edges.
| Ingredient | Amount | Notes |
|---|---|---|
| All-Purpose Flour 🌾 | 2 ½ cups | Sifted for light texture |
| Granulated Sugar 🍚 | 1 ½ cups | White or light brown |
| Unsalted Butter 🧈 | 1 cup | Softened to room temperature |
| Large Eggs 🥚 | 2 whole | Room temperature for best mixing |
| Vanilla Extract 🌸 | 2 tsp | Pure vanilla preferred |
| Baking Powder 🍞 | 2 tsp | Double-acting for proper rise |
| Ground Cinnamon 🌿 | 1 ½ tsp | Freshly ground preferred |
| Ground Nutmeg 🌿 | ½ tsp | Freshly grated for warmth |
| Salt 🧂 | ½ tsp | Fine sea salt preferred |
| Apples 🍏 | 4 medium | Honeycrisp or Fuji, peeled |
| Whole Milk 🥛 | ½ cup | Full-fat for moisture |
The apples are the heart of this recipe—Honeycrisp or Fuji hold their shape while baking, but any firm variety works. Walmart or local grocery stores usually carry these, or check the produce section for pre-washed apples if you're short on time. Peeled and sliced into even 1/4-inch pieces, they'll soften beautifully without turning mushy. For extra flavor, toss them with a pinch of cinnamon before folding into the batter. The butter matters too—Land O'Lakes or Plugrá work perfectly, but avoid margarine for that rich, buttery flavor the recipe promises.
No Honeycrisp? Gala or Pink Lady apples are great substitutes—they're sweeter and hold up well. Running out of milk? Heavy cream or almond milk both work, though the texture may vary slightly. The vanilla extract can be swapped for vanilla bean paste if you want deeper flavor, or even a splash of apple cider for extra fruity notes. For a nutty twist, add 1/2 cup chopped walnuts to the batter. And if you're feeling ambitious, fold in 1/2 cup of dried cranberries for a festive touch.
This cake keeps beautifully—3-4 days at room temperature wrapped in foil, or up to 1 week in the fridge. For longer storage, slice and freeze individual portions on a tray before transferring to a bag. Reheat slices in the microwave for 20 seconds or at 350°F for 5 minutes to restore that fresh-baked warmth. The best part? It reheats perfectly, making it ideal for meal prep or last-minute dessert cravings. Leftovers? Perfect with a dollop of vanilla ice cream or a sprinkle of powdered sugar.
Why You'll Love This Recipe
- No Mixer Needed: I swear by this one—just fold the flour into the butter until it looks like crumbs, then stir in the apples. No stand mixer, no fuss, and the texture comes out tender every time. The eggs and vanilla do the heavy lifting while you’re really only mixing for about two minutes.
- Spiced Sweetness Without Effort: That caramelized sugar on the apples? It’s the secret. I toss them with cinnamon and a pinch of nutmeg before baking, and the butter melts into them just enough to make each bite taste like autumn in a pan. Honestly, the smell alone is worth it.
- Weeknight Dinner or Dessert: This isn’t just cake—it’s a meal. Serve it warm with a scoop of vanilla ice cream for dessert, or cut into squares and pack for lunch the next day. My kids ask for it after school snacks, and my husband sneaks seconds when he thinks I’m not looking.
- Pantry Staples, Zero Waste: You’re using flour, sugar, and butter you already have, plus whatever apples are on sale. The leftovers? They stay fresh for days, or I freeze slices for quick breakfasts. Between us, this is the kind of recipe that makes grocery shopping feel like a victory.
Step-by-step instructions for apple cake tray bake
This method delivers a tender, moist apple cake with perfect spice balance and golden edges.
👨🍳 Step 1: Prepare the Dry and Wet Ingredients Separately
In a medium bowl, whisk together the 2.5 cups all-purpose flour, 2 tsp baking powder, 1.5 tsp ground cinnamon, 0.5 tsp ground nutmeg, and 0.5 tsp salt. Sift the flour mixture through a fine-mesh sieve directly into the bowl to aerate it—this creates a lighter texture. Set aside.
In a separate large bowl, cream the 1 cup softened unsalted butter and 1.5 cups granulated sugar together using an electric mixer on medium speed for 3-4 minutes. The mixture should become light and fluffy, nearly doubling in volume. This step incorporates air, which helps create that signature tender crumb.
👨🍳 Step 2: Combine Wet Ingredients and Incorporate Apples
Add the 2 whole large eggs, one at a time, mixing well after each addition until fully combined. Stir in the 2 tsp vanilla extract and 0.5 cup whole milk, mixing just until smooth. Gradually add the dry ingredients to the wet mixture, mixing on low speed until just combined—you should still see small flour streaks. Overmixing develops gluten, which can make the cake dense.
Peel, core, and slice the 4 medium apples into ¼-inch thick rounds. Toss the apple slices with 1 tablespoon lemon juice (not listed but critical) to prevent browning. Fold half of the apple slices into the batter, reserving the rest for the final layer.
🥘 Step 3: Layer and Bake for Moist Perfection
Preheat your oven to 350°F and grease a 9x13-inch baking dish lightly with butter or line it with parchment paper for easy removal. Pour half of the batter into the prepared dish, spreading it evenly with a spatula. Arrange half of the reserved apple slices in a single layer over the batter, slightly overlapping them.
Add the remaining batter over the apples, then top with the remaining apple slices. The apples should be mostly covered but visible through the top. Bake for 45-50 minutes until the edges are golden brown and a toothpick inserted near the center comes out clean. The top should spring back gently when pressed.
⏰ Step 4: Rest and Serve Warm
Remove the cake from the oven and let it cool in the pan for 10 minutes before transferring to a wire rack. This brief resting period allows the cake to set slightly while retaining maximum moisture. Serve warm for the best texture—each slice should be tender with juicy apple pieces throughout.
For extra warmth, dust with powdered sugar or serve with a scoop of vanilla ice cream. The cake keeps well at room temperature for 2 days or can be refrigerated for up to 4 days, though it's best enjoyed fresh from the oven.
Pro Tips For Making Apple Cake Tray Bake
- Melt the Butter Slowly: If you’re dumping cold butter straight into the dry ingredients, you’re fighting the recipe. Warm the butter to just under 100°F (38°C)—soft enough to mix easily but not hot enough to cook the eggs. I learned this the hard way when my first batch turned out greasy instead of tender.
- Use Room-Temp Eggs: Cold eggs from the fridge will curdle when mixed with warm butter, leaving you with a lumpy batter. Let them sit in warm water for 5 minutes (yes, even if you’re impatient like me) or take them out 20 minutes before baking. Smooth batter = even baking.
- Don’t Overmix the Batter: Once you’ve combined the wet and dry ingredients, stop stirring after 10-12 turns. Overmixing develops the gluten in the flour, which turns your cake into a dense brick. Fold in the apples gently—they’ll hold their shape better, and the texture stays light.
- Bake Until the Center Springs: The recipe might say “30-35 minutes,” but your oven lies. Insert a toothpick at the center—it should come out with moist crumbs, not wet batter. If it’s dry but the edges are still soft, tent with foil and give it 5 more minutes. Underbaking is forgivable; soggy cake isn’t.
Make-ahead tips for this recipe
Prep Ahead for Stress-Free Baking
Mix the batter up to 24 hours ahead and store it in an airtight container in the fridge. The flavors meld beautifully overnight, and you'll save time on baking day.
Just let it sit at room temperature for 30 minutes before pouring into the tray. I always prep the batter the night before—it's a game-changer for busy mornings. 🌟
Apple Prep Shortcut
Peel and slice the apples the day before and store them in a bowl covered with lemon juice and a damp paper towel. This prevents browning and keeps them crisp.
When ready to bake, simply drain and pat them dry before folding into the batter. It's a time-saver that makes the whole process feel effortless.
Batter Storage Tips
If you're making this cake for a large gathering, divide the mixed batter into two 9x13-inch trays and bake simultaneously. Use the same recipe quantities but pour half into each tray. This cuts baking time in half and ensures even cooking. Just
Make-Ahead Apple Layer
For an extra convenient approach, slice and toss the apples with 1 tablespoon lemon juice and store them in a sealed container in the fridge. When you're ready to bake, simply fold them into the batter as directed. This keeps your prep organized and ensures the apples stay fresh until the last minute.
Freezing Fully Baked Cake
Slice the fully baked and cooled cake into portions and wrap each slice tightly in plastic wrap, then place them in a freezer bag. They'll keep for up to 3 months without losing moisture.
To serve, thaw at room temperature for 1-2 hours or reheat slices in the oven at 350°F for 5 minutes to restore that warm, comforting texture. 💫
Batch Baking for Meal Prep
Double the recipe and bake two trays at once for easy meal prep. Store the baked cakes in airtight containers at room temperature for 3-4 days or freeze for up to 1 month.
Reheat individual slices in the microwave for 20-30 seconds or warm them in the oven for a fresh-from-bake experience. Perfect for quick breakfasts or after-dinner treats all week long.
Nutrition facts
Frequently asked questions
Can I use any type of apple for this recipe?
You can use most firm apple varieties, but Honeycrisp or Fuji work best—they hold their shape while baking without turning mushy. For a sweeter cake, try Gala or Pink Lady. Avoid overly soft apples like Red Delicious, as they'll break down too much in the oven.
Why does the recipe call for lemon juice with the apples?
The 1 tablespoon lemon juice prevents the apples from browning before baking, keeping them vibrant and fresh-tasting. It also helps balance the sweetness of the apples with a subtle tang. If you're short on time, a splash of apple cider works too!
How do I know when the cake is fully baked?
The cake is done when the edges are golden brown and a toothpick inserted near the center comes out clean (or with just a few moist crumbs). The top should also spring back gently when pressed. Baking times vary slightly by oven, so keep an eye on it after 40 minutes.
Can I make this cake in a different-sized tray?
Yes! For a 9x13-inch tray, use the full recipe. For a 9x9-inch tray, reduce baking time by about 10-15 minutes. If using a 13x9-inch tray, the recipe works as-is, but check for doneness early—smaller trays may bake faster. Always grease or line the tray well.
What if my cake turns out too dense?
Overmixing the batter or using cold ingredients can cause density. Make sure your butter and eggs are at room temperature, and mix just until combined (small flour streaks are fine). For extra moisture, brush the top with a simple syrup (equal parts sugar and water) after baking.