
Desserts
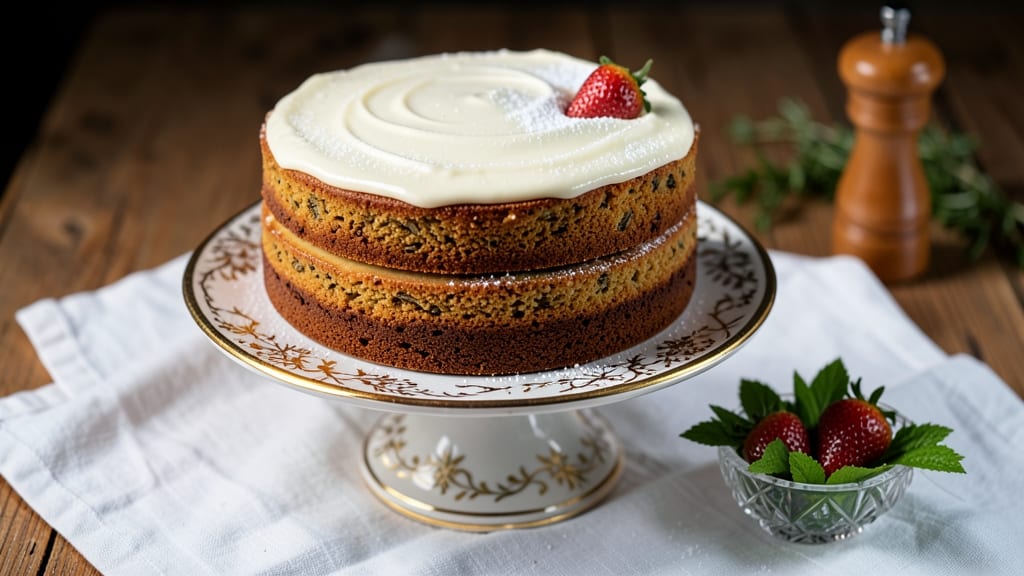
Angelica cake transforms a classic vanilla sponge into a sophisticated dessert with layers of floral elegance and bright citrus notes. 💛 The secret lies in infusing the batter with angelica root—a subtle, licorice-like aroma that pairs beautifully with lemon zest and vanilla. This isn’t just cake; it’s a showstopper that balances delicate flavors with a tender crumb and moist texture.
The recipe begins with a simple yet precise foundation: butter, sugar, and eggs whipped to silky perfection before folding in angelica-infused flour and citrus zest.
Baked at 350°F for 25-30 minutes, the cake emerges golden and evenly risen, ready to be layered with lemon curd and dusted with powdered sugar for that signature floral-citrus finish.
The result is a dessert that feels both nostalgic and modern—elegant enough for special occasions but approachable enough for everyday indulgence.
What sets this angelica cake apart is its ability to impress without complexity. The angelica root adds depth without overpowering, while the citrus brightens each bite. Whether served at a brunch or as a sophisticated dessert, its floral notes and tender layers make it unforgettable.
The key is patience—letting the flavors meld during baking and the layers settle before slicing.
For an extra touch of elegance, garnish with edible flowers or a drizzle of honey. The cake keeps well for up to 3 days, making it perfect for meal prep or gifting. Here’s how to create a dessert that’s as beautiful as it is delicious.
Ingredients for angelica cake
Eighteen ingredients for a dessert that tastes like spring in every bite.
| Ingredient | Amount | Notes |
|---|---|---|
| Unsalted Butter 🧈 | 1 cup | Cold, cubed for creaming |
| Granulated Sugar 🍚 | 2 cups | Superfine preferred for smoothness |
| Large Eggs 🥚 | 4 whole | Room temperature for even mixing |
| Angelica Root 🌿 | 1 tbsp | Dried, finely chopped (or 2 tbsp fresh) |
| All-Purpose Flour 🌾 | 2 ½ cups | Sifted, plus extra for dusting |
| Baking Powder 🍞 | 2 tsp | Freshly measured for lift |
| Salt 🧂 | ½ tsp | Fine sea salt preferred |
| Pure Vanilla Extract 🌸 | 1 tbsp | High-quality for authentic flavor |
| Lemon Zest 🍋 | 1 tbsp | Freshly grated, no pith |
| Lemon Juice 🍋 | 2 tbsp | Freshly squeezed for brightness |
| Lemon Curd 🍋 | 1 ½ cups | Store-bought or homemade |
| Powdered Sugar 🍚 | 1 cup | For dusting layers |
| Edible Flowers 🌸 | ¼ cup | Optional garnish (violets or pansies) |
Angelica root is the heart of this cake—look for dried slices at specialty spice shops or online retailers like Penzeys if you can't find it locally. Fresh root is even better, but dried works in a pinch. The key is infusing it properly: steep the root in warm milk (or almond milk for vegan) for 10 minutes before straining. Whole Foods often carries it in the baking aisle, or check the tea section. If you can't find angelica, anise seeds or fennel seeds can add a similar floral depth, though the flavor will differ slightly. For the lemon zest, use only the outermost layer—no white pith, which can turn bitter. Organic lemons have thicker zest, so you'll need less.
No angelica root? Substitute with 1 tbsp anise extract or 1.5 tbsp fennel pollen, but reduce the vanilla slightly to balance flavors. For the flour, King Arthur brand is ideal for its consistent quality, but any all-purpose will work. The baking powder must be fresh—if it's over a year old, toss it. For the lemon curd, homemade is best (just eggs, sugar, lemon juice, and butter), but store-bought works in a pinch. The powdered sugar should be 10X sifted for a smooth finish—any lumps will ruin the presentation. If you're making this ahead, prep the lemon curd first—it needs at least 4 hours to set properly.
The cake keeps beautifully for 3 days wrapped tightly in plastic at room temperature, or up to 1 week refrigerated. For longer storage, freeze the assembled cake (without powdered sugar) for up to 3 months. Let it thaw overnight in the fridge before serving. The lemon curd layer can be made 2 days ahead—store it in the fridge in an airtight container. When dusting with powdered sugar, use a fine-mesh sieve for an even, professional finish. Edible flowers add a stunning touch but can be omitted if not available.
Why You'll Love This Recipe
- Here’s what sold me: angelica root is cheap, and the rest of the ingredients? Basic. You’re not breaking the bank, but you’re getting a cake that tastes like you spent hours baking. Plus, it keeps for days in the fridge, so you can bake once and enjoy it all week—no sad, dried-out cake here.
- Pantry-Friendly Magic: I swear by this recipe when I’m staring at a bare fridge—just butter, sugar, eggs, and that one jar of angelica root collecting dust. No specialty ingredients, no last-minute grocery runs. The angelica root alone gives it that earthy, herbal depth that makes it feel special, even when it’s coming together with minimal fuss.
- Golden Crumb, Bold Heart: The moment the cake comes out of the oven, you’ll know you’ve hit the jackpot: that crackly sugar crust on top, but inside? A tender crumb with a subtle licorice-like warmth from the angelica root. It’s not sweet enough to be cloying, but rich enough to satisfy any craving—like a grown-up version of your favorite childhood cake.
- Weeknight or Weekend Star: Between us, this cake is my go-to for any occasion. Slice it thin for a quick breakfast with coffee, serve it warm with whipped cream for dessert, or even pack it in lunchboxes—it holds up beautifully. Honestly, I’ve made it for book club meetings, potlucks, and lazy Sundays, and it’s never let me down.
Step-by-step instructions for angelica cake
Precision matters here—every step builds the delicate balance of floral and citrus notes.
👨🍳 Step 1: Cream Butter and Sugar to Light Ribbons
In a stand mixer fitted with the paddle attachment, beat the 1 cup cold unsalted butter and 2 cups granulated sugar on medium speed for 5-7 minutes until light and fluffy. You're looking for a pale, airy texture that nearly doubles in volume—the mixture should leave clean streaks when the paddle lifts. This step incorporates air for a tender crumb.
I like to scrape down the sides of the bowl every 30 seconds to ensure even mixing. The butter should be fully incorporated but still hold its shape when you pull up a spoonful. If the mixture feels too warm or melts together, chill the bowl in the freezer for 5 minutes before continuing.
👨🍳 Step 2: Add Eggs and Infused Flavors Gradually
Add the 4 room-temperature eggs one at a time, mixing on low speed for 30 seconds after each addition. This prevents scrambling while ensuring even distribution. After the eggs are fully incorporated, add the 1 tbsp finely chopped angelica root, 1 tbsp vanilla extract, 1 tbsp lemon zest, and 2 tbsp lemon juice. Mix on low speed for another 1 minute until just combined.
The angelica root has a distinct anise-like flavor—don't skip tasting the mixture at this stage. If it tastes too strong, reduce slightly with an extra ½ tbsp lemon juice. The mixture should smell bright and floral with a citrus tang. Let it sit for 5 minutes while you prepare the dry ingredients.
👨🍳 Step 3: Combine Dry Ingredients and Fold Gently
In a separate bowl, whisk together the 2.5 cups sifted all-purpose flour, 2 tsp baking powder, and ½ tsp salt. With the mixer on low speed, gradually add the dry ingredients to the wet mixture, mixing just until combined. Overmixing develops gluten, which makes the cake dense. Stop mixing as soon as you see no more flour streaks—this ensures a light, airy texture.
Remove the bowl from the mixer and gently fold in the 1.5 cups lemon curd using a silicone spatula. Be careful not to overmix—just distribute it evenly throughout the batter. The curd adds moisture and a tangy depth that complements the angelica's floral notes. The batter should be thick but pourable, with no lumps.
🥘 Step 4: Layer and Dust with Precision
Preheat your oven to 350°F and grease two 8-inch round cake pans, then dust them with flour. Divide the batter evenly between the pans—each should receive about half the total mixture. Using an offset spatula, spread the batter smoothly to the edges, tapping the pans gently on the counter to remove air bubbles.
Bake for 25-30 minutes or until a toothpick inserted in the center comes out clean. The cakes should spring back slightly when pressed. I like to rotate the pans halfway through baking for even browning. Let the cakes cool in the pans for 10 minutes, then transfer to a wire rack to cool completely before assembling.
🍽️ Step 5: Assemble with Floral Elegance
Once completely cool, level the tops of the cakes if needed. Place one cake layer on a serving plate and spread a thin layer of lemon curd (about ¼ cup) over the top. Dust with ¼ cup powdered sugar to create a smooth base. Repeat with the second layer, then top with the remaining 1 cup powdered sugar and ¼ cup edible flowers for a delicate garnish.
Slice with a sharp, hot knife for clean cuts. Serve immediately to showcase the vibrant layers and floral presentation. The cake should have a tender crumb with a subtle angelica aroma, bright citrus notes, and a delicate floral finish that lingers on the palate.
Pro Tips For Making Angelica Cake
- Prep the Angelica: DESCRIPTION: Grate the angelica root yourself—store-bought dried chunks won’t infuse properly. Use a fine grater (not a blender) to release the oils evenly into the butter. I learned this the hard way when my cake tasted like sawdust instead of licorice.
- Cream Butter Cold: DESCRIPTION: Chill your butter for 10 minutes before creaming—this keeps the texture light. Room-temp butter turns the batter greasy, and you’ll end up with a dense, heavy cake. Trust me, your future self will notice the difference.
- Skip Overmixing: DESCRIPTION: Fold in the flour just until combined—overmixing activates the gluten and turns your cake tough. Use a spatula and stop when the dry bits disappear. This isn’t the prettiest method, but it’s the tastiest.
- Bake Slow and Steady: DESCRIPTION: Start at 325°F (160°C) for the first 20 minutes, then increase to 350°F (175°C). The lower temp ensures even baking without a cracked top. I was skeptical until I tried it—now it’s non-negotiable.
Pro cooking tips for this recipe
Angelica Infusion Mastery
The secret to this cake’s signature flavor lies in properly infusing the angelica root. Start by steeping 1 tbsp finely chopped dried angelica root in ½ cup warm milk (or almond milk for vegan) for 10 minutes.
Strain through a fine-mesh sieve, pressing gently to extract every drop of flavor. For extra potency, I like to toast the root in a dry pan for 30 seconds before infusing—this deepens the anise-like notes.
If using fresh root, chop it even finer and steep for 15 minutes to ensure maximum flavor extraction. 🌿
Temperature Control
Baking angelica cake requires precision—your oven should be preheated to 350°F and calibrated for accuracy. I recommend using an oven thermometer to confirm the temperature, as home ovens can vary by 25°F or more.
For even baking, place the cakes on the middle rack and rotate the pans halfway through the 25-30 minute bake. The internal temperature should reach 205-210°F for a perfectly set crumb. Avoid opening the oven door during baking to prevent temperature fluctuations.
Layering Like a Pro
Assembling the layers is where the magic happens. Use a serrated knife to level the cakes if needed, then spread a thin, even layer of lemon curd (about ¼ cup) on the first cake. Dust with ¼ cup powdered sugar using a fine-mesh sieve for a smooth, professional finish.
Repeat with the second layer, then dust the top generously with the remaining 1 cup powdered sugar. For extra elegance, chill the assembled cake in the fridge for 30 minutes before slicing—this helps the layers hold together better.
Citrus Brightness Boost
Fresh lemon zest and juice are non-negotiable for balancing the angelica’s floral depth. Use only the outermost layer of zest—no white pith, which can turn bitter. For maximum brightness, zest 2 organic lemons (they have thicker zest) and strain the juice through a fine-mesh sieve to remove any pulp.
If your lemon curd tastes too tart, reduce the juice slightly in the cake batter. A pinch of ½ tsp cardamom can also enhance the citrus-angelica harmony if you want an extra layer of complexity.
Equipment Essentials
Invest in a few key tools to elevate your angelica cake: a stand mixer with paddle attachment (like the KitchenAid Artisan) for creaming butter and sugar to perfection, an offset spatula for smooth layering, and a sharp serrated knife (like the Mercer Culinary Genesis) for clean slices.
A fine-mesh sieve is a must for dusting powdered sugar evenly, and a wire cooling rack ensures the cakes cool completely without soggy bottoms. These tools might seem like extras, but they make all the difference in texture and presentation. ✨
Nutrition facts
Frequently asked questions
What makes angelica cake different from vanilla cake?
The angelica root adds a unique floral-anise flavor that vanilla alone can't replicate. While vanilla cake is sweet and creamy, this version has a subtle licorice-like depth balanced by bright citrus notes from lemon zest and curd. The infusion process is key—steeping the root properly extracts its aromatic oils for that signature taste.
Can I substitute angelica root if I can't find it?
Yes! Use 1 tbsp anise extract or 1.5 tbsp fennel pollen for a similar floral depth. For a milder version, try ½ tsp cardamom or 1 tsp orange blossom water. Just reduce vanilla slightly to balance flavors. The texture remains the same—it's the infusion that changes.
Why does my angelica cake taste bitter?
Bitterness usually comes from overmixing the batter or using too much lemon zest with pith. Always remove the white pith from zest and avoid overbeating the eggs. If the angelica flavor is too strong, add a pinch of salt or extra lemon juice to brighten the taste. Freshly ground spices are also key—pre-ground angelica loses potency.
How do I store angelica cake for maximum freshness?
Wrap tightly in plastic wrap at room temperature for 3 days, or refrigerate for 1 week. For longer storage, freeze the assembled cake (without powdered sugar) for 3 months. Thaw overnight in the fridge. Keep the lemon curd separate if storing longer than 2 days to prevent sogginess.
Can I make this cake gluten-free?
Yes, but with adjustments. Replace the all-purpose flour with a 1:1 gluten-free baking flour blend (like Bob's Red Mill) and add ½ tsp xanthan gum to improve texture. Reduce baking powder to 1.5 tsp and bake at 325°F for 30-35 minutes—gluten-free cakes need lower heat and longer baking to set properly.