
Desserts
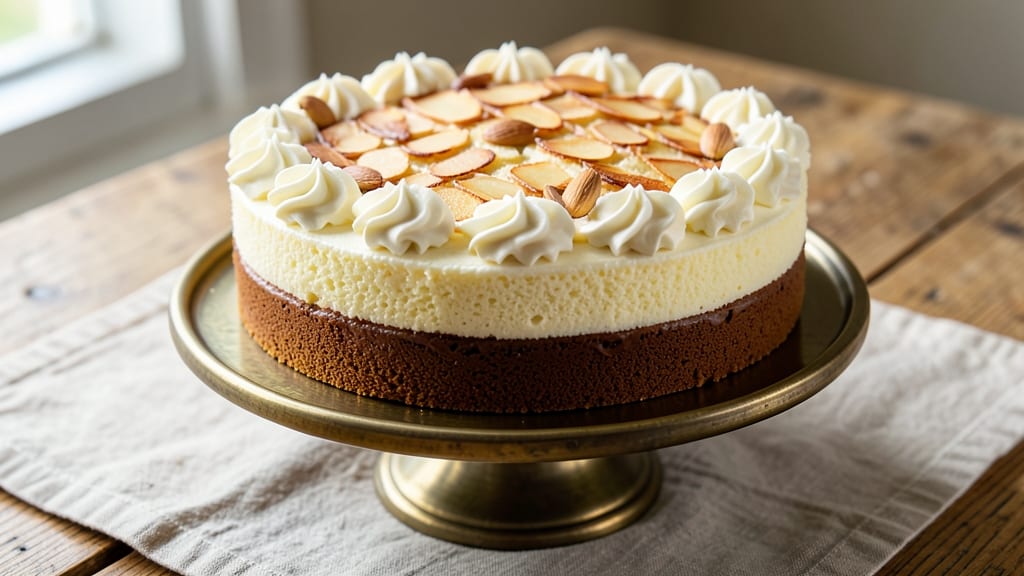
This Australian butter cake recipe delivers the perfect balance of a golden crust and ultra-moist layers that disappear in every bite. 💛 The secret lies in the precise ratio of butter to flour and the use of self-raising flour, which creates that signature tender crumb without needing extra leavening.
I've baked this version countless times for family gatherings, and it never fails to impress—whether served warm with tea or at room temperature with a dusting of powdered sugar.
The recipe relies on a few key techniques to achieve its signature texture: creaming the butter and sugar thoroughly, folding in the dry ingredients gently, and baking at a moderate temperature to prevent over-browning. Self-raising flour eliminates the need for baking powder, ensuring a light yet sturdy crumb.
The cake's simplicity makes it perfect for beginners, but the results are anything but basic—this is the kind of dessert that feels like a hug in cake form.
What sets this butter cake apart is its ability to stay moist for days, even without frosting. The butter content keeps it rich and flavorful, while the self-raising flour ensures it rises just enough to create that classic domed shape.
For a twist, you can infuse the batter with vanilla extract or lemon zest, adding layers of aroma that complement the buttery base. The golden crust develops beautifully, giving it that irresistible bakery-style finish.
Serve it warm with a pat of butter melting on top or at room temperature with a dusting of powdered sugar and fresh berries. This cake is equally at home as a celebratory dessert or a comforting treat for any occasion. Let's get baking—your taste buds will thank you.
Ingredients for australian butter cake
Eight simple ingredients create Australia's most beloved cake—moist layers and golden crust guaranteed.
| Ingredient | Amount | Notes |
|---|---|---|
| Unsalted Butter 🧈 | 1 ½ cups | Room temperature, European-style preferred |
| Granulated Sugar 🍚 | 2 cups | White or light brown for subtle caramel notes |
| Large Eggs 🥚 | 4 whole | Room temperature for even mixing |
| Self-Raising Flour 🌾 | 3 cups | Plus 1 tbsp extra for dusting pan |
| Vanilla Extract 💧 | 2 tsp | Pure vanilla for authentic flavor |
| Milk 🥛 | 1 cup | Whole milk for richness (or plant-based) |
| Powdered Sugar 🍚 | ¼ cup | For dusting finished cake |
| Fresh Lemon Zest 🍋 | 1 tbsp | Optional but adds bright citrus note |
| Salt 🧂 | ¼ tsp | Fine sea salt for balance |
| Vegetable Oil 🫒 | ¼ cup | Lightens texture slightly (optional) |
The butter is non-negotiable here. European-style unsalted butter (like Plugrá or President) has higher fat content, which gives that signature tender crumb. If you only have regular butter, use it—just don't overbeat the batter. The self-raising flour is key too; it's pre-mixed with baking powder, so no need to add extra leavening. King Arthur or Betty Crocker are reliable brands. For the sugar, I always grab Domino brand—it dissolves perfectly without graininess. Store your butter in the fridge until ready to use, then let it sit at room temperature for about an hour before creaming.
No vanilla extract? Vanilla bean paste works too, or even a pinch of ground vanilla bean. The milk can be swapped for evaporated milk for even richer flavor, or coconut milk for a dairy-free version. Lemon zest is optional but worth it—organic lemons from the grocery store work fine, just make sure they're fresh. The vegetable oil is optional but helps create a slightly lighter texture. If you skip it, just add an extra tablespoon of milk. For the powdered sugar, Confectioners' sugar from Domino is my go-to—it's fine enough to dust perfectly without clumping.
This cake keeps beautifully—3-4 days at room temperature wrapped in plastic, or 1 week in the fridge. For longer storage, slice and freeze portions for up to 3 months. I always bake it in two 9-inch rounds for easy serving. The secret to that golden crust? Brush the top with a bit of milk or melted butter in the last 5 minutes of baking. And trust me on this—don't overmix the batter. Just fold the dry ingredients in until combined. That's what keeps it tender.
Why You'll Love This Recipe
- Four Ingredients, Big Payoff: I swear by this cake’s simplicity—just butter, sugar, eggs, and flour (plus a splash of vanilla). No fancy techniques, no last-minute ingredient hunts. The self-raising flour does all the heavy lifting, so you’re basically mixing, baking, and admiring in one go.
- Vanilla Butter Bliss: That first bite? Rich, tender crumb with a whisper of vanilla that lingers. The butter isn’t just melted in—it’s creamed properly, so every slice feels like a hug. Honestly, I’ve tried store-bought vanilla cake, and this one wins every time.
- Weeknight to Party Star: Slice it warm with tea for a lazy afternoon, or frost it with cream cheese for a birthday cake that’ll fool everyone. The base is so neutral it takes flavor like a champ—whether you’re keeping it classic or adding jam, chocolate, or even a sprinkle of sea salt.
- Leftovers That Don’t Suffer: This cake stays moist for days (yes, even on day three), so it’s my go-to for meal prep. Pack a few slices in the fridge, and they’re still better than most bakery cakes. Plus, it’s cheap to make—you’ll have change left over for extra sugar on top.
Step-by-step instructions for Australian butter cake
Here's how to bake the perfect Australian butter cake—golden crust, ultra-moist layers every time.
👨🍳 Step 1: Cream Butter and Sugar Until Light
In a stand mixer fitted with the paddle attachment, beat the 1.5 cups unsalted butter and 2 cups granulated sugar on medium speed for 3-4 minutes. You're looking for a pale, fluffy mixture that nearly doubles in volume—this incorporates air that creates those signature tender layers.
I like to scrape down the sides of the bowl every 30 seconds to ensure everything gets properly creamed. The butter should be completely smooth with no graininess, and the mixture should feel light when you lift the paddle. This step is non-negotiable for that classic Australian butter cake texture—don't rush it!
👨🍳 Step 2: Add Eggs and Flavorings
Add the 4 whole large eggs, one at a time, mixing on low speed for 30 seconds after each addition until fully incorporated. Then add the 2 tsp vanilla extract, 1 tbsp fresh lemon zest, and 0.25 tsp salt, mixing just until combined.
The lemon zest adds that bright citrus note that makes this cake truly Australian. I always use fresh zest rather than bottled—it makes a noticeable difference. The mixture might look slightly curdled after adding the eggs, but don't worry. Once you add the dry ingredients, everything will come together beautifully.
👨🍳 Step 3: Alternate Dry Ingredients with Milk
With the mixer on low speed, add 1 cup milk in a slow stream, mixing just until combined. Then add the 3 cups self-raising flour and the 0.25 cup vegetable oil, mixing on low speed for 30-45 seconds until just combined—you should still see a few flour streaks.
This alternating method creates a tender crumb rather than a dense one. Overmixing develops gluten, which would make the cake tough. Stop mixing as soon as the flour disappears—this is where the magic happens for that ultra-moist texture we're after.
🔥 Step 4: Bake in a Hot Oven
Preheat your oven to 350°F and grease two 8-inch round cake pans (or one 9x13-inch pan) thoroughly with butter, then dust with flour. Divide the batter evenly between the pans and tap them gently on the counter to remove any air bubbles.
Bake for 25-30 minutes until a toothpick inserted into the center comes out clean and the top springs back when pressed gently. The cake should be golden brown with a slight crack in the center—this is normal and indicates it's done. I always check at the 25-minute mark because ovens vary.
⏰ Step 5: Cool and Dust with Powdered Sugar
Remove the cakes from the oven and let them cool in the pans for 10 minutes. Then transfer to a wire rack to cool completely. Once fully cooled, dust the tops generously with the 0.25 cup powdered sugar using a fine-mesh sieve for that classic Australian presentation.
This step is what makes the cake look professional and adds that sweet finishing touch. The powdered sugar also helps preserve moisture in the cake. Slice while still warm for the most tender texture, but it's just as delicious at room temperature the next day.
Pro Tips For Making Australian Butter Cake
- Mix Butter and Sugar Slowly: I learned this the hard way—dumping everything in the mixer at once just makes a greasy mess. Start on low speed and gradually increase, letting the butter and sugar emulsify properly before adding eggs. This keeps the crumb light and prevents a dense, heavy cake.
- Use Room-Temperature Eggs: Cold eggs from the fridge will curdle when mixed with warm butter, and that’s a texture disaster. Take them out 30 minutes before baking, or even better, let them sit in warm water for 5 minutes. The batter will be smoother, and the cake will rise better.
- Don’t Overmix the Batter: Self-raising flour is your friend, but it’s also temperamental. Once you fold in the flour, mix just until combined—no more. Overmixing develops the gluten and turns your tender butter cake into a chewy loaf. Stop when there are no dry spots, and resist the urge to keep stirring.
- Bake Until the Toothpick Test Works: The recipe might say "golden brown," but that’s not always reliable. Insert a toothpick into the center—it should come out clean or with a few very moist crumbs. If it’s wet with batter, pop it back in for another 5-10 minutes. Underbaking is the #1 reason Australian butter cakes turn out gummy.
Pro cooking tips for perfect results
Butter Creaming Mastery
The key to that signature ultra-moist texture starts with proper butter creaming. Use a stand mixer with the paddle attachment and cream the 1.5 cups unsalted butter and 2 cups sugar on medium speed for 3-4 minutes—this incorporates air that creates those tender layers.
I recommend European-style butter like Plugrá for its higher fat content, which gives that signature melt-in-your-mouth quality. Scrape down the bowl every 30 seconds to ensure even mixing and prevent graininess. 🧈
Egg Addition Technique
Add the 4 large eggs one at a time, mixing on low speed for 30 seconds after each addition. This gradual incorporation prevents curdling and ensures a smooth batter.
After the eggs, fold in the 2 tsp vanilla extract, 1 tbsp lemon zest, and ¼ tsp salt—just until combined. The lemon zest is optional but adds that bright, authentic Australian flavor. Fresh zest makes a noticeable difference compared to bottled versions.
Alternating Wet and Dry
The secret to a tender crumb lies in the alternating method. With the mixer on low speed, slowly stream in the 1 cup milk first, then add the 3 cups self-raising flour and ¼ cup vegetable oil.
Mix for only 30-45 seconds until just combined—you should still see a few flour streaks. Overmixing develops gluten, which leads to a tough cake. This gentle folding keeps the texture light and airy. ✨
Pan Prep and Baking
Grease your 8-inch round cake pans thoroughly with butter and dust with flour (or use parchment paper for easy release). Divide the batter evenly and tap the pans gently on the counter to remove air bubbles.
Bake at 350°F for 25-30 minutes—the cake is done when a toothpick comes out clean and the top springs back when pressed. For a golden crust, brush the tops with a bit of milk or melted butter in the last 5 minutes of baking.
Cooling and Finishing
Let the cakes cool in the pans for 10 minutes, then transfer to a wire rack to cool completely. Once fully cooled, dust generously with ¼ cup powdered sugar using a fine-mesh sieve for that classic Australian presentation.
This step not only looks professional but also helps preserve moisture. Slice while still warm for the most tender texture, but it’s just as delicious at room temperature the next day. 💛
Pro Tip: Room-Temp Ingredients
Always use room-temperature butter and eggs—this ensures even mixing and a smoother batter. Let the butter sit at room temperature for about 1 hour before creaming, and take the eggs out of the fridge 30 minutes before using.
Cold ingredients can cause the batter to separate or develop lumps, leading to an uneven texture. Trust me, this small step makes a huge difference in the final result. 💡
Nutrition facts
Frequently asked questions
Can I substitute self-raising flour with all-purpose flour?
Yes, but you'll need to add leavening. Replace the 3 cups self-raising flour with 2.75 cups all-purpose flour plus 1.5 tsp baking powder. Self-raising flour already contains baking powder and salt, so this adjustment maintains the cake's signature tender crumb. The texture will be slightly different but still delicious!
Why does my Australian butter cake turn out dense?
Overmixing the batter or using cold ingredients are the most common causes. Stop mixing as soon as the flour disappears (about 30-45 seconds after adding dry ingredients). Also, ensure your butter and eggs are at room temperature. Another tip: don't overfill the pans—batter should come 2/3 up the sides.
Can I make this cake in a bundt pan?
The batter works beautifully in a 10-12 cup bundt pan. Grease it thoroughly with butter and dust with flour, then reduce baking time to 40-45 minutes. The cake will have a stunning ring shape with the same tender texture. Just check for doneness with a toothpick—it should come out clean.
How can I add chocolate to this recipe?
For a chocolate twist, melt ½ cup dark chocolate and let it cool slightly, then fold it into the batter after adding the milk. Alternatively, replace ½ cup milk with ½ cup strong brewed coffee and add ½ cup cocoa powder to the dry ingredients. The cake will have subtle chocolate notes without being overpowering.
What's the best way to store leftover cake?
Wrap the cake tightly in plastic wrap or aluminum foil and store at room temperature for up to 3-4 days. For longer storage, slice and freeze portions for up to 3 months. To serve frozen slices, thaw at room temperature for 1-2 hours or warm in the oven at 300°F for 10 minutes to restore moisture.