
Desserts
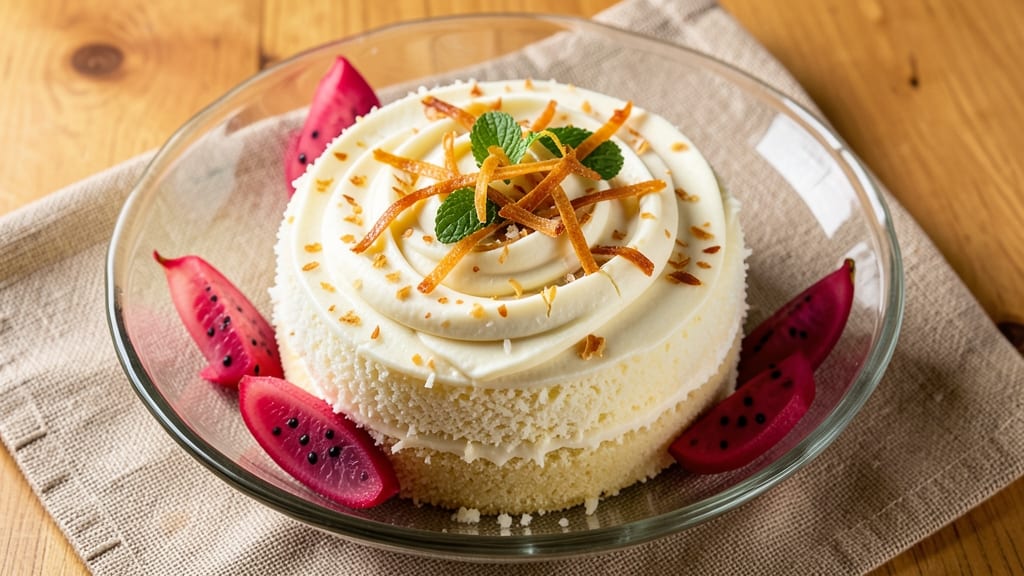
This Asian coconut cake delivers layers of toasted coconut and an ultra-moist crumb that stays fresh for days—inspired by traditional Filipino bibingka but elevated with modern baking techniques. The secret lies in blending coconut milk with melted butter for unparalleled tenderness, while toasted coconut flakes add crunch and depth.
What sets this apart is the delicate balance of sweetness and coconut aroma that transports you to tropical kitchens without sacrificing simplicity.
The recipe begins with a foolproof batter that combines coconut milk, eggs, and a touch of baking powder for that signature fluffy texture. Toasted coconut flakes are folded into the batter for pockets of nutty flavor, while a simple glaze of powdered sugar and coconut milk creates a glossy finish.
Unlike many coconut cakes that dry out quickly, this version stays moist for up to five days when stored properly—perfect for gifting or meal prep.
What you’ll end up with is a cake that’s rich yet light, with a golden crust and layers of toasted coconut that add both texture and aroma. The ultra-moist crumb melts in your mouth, while the coconut glaze ties everything together with a subtle sweetness.
This is the kind of dessert that feels special enough for celebrations but simple enough for a weeknight treat.
Serve it warm with a scoop of coconut ice cream or enjoy it at room temperature with a cup of strong coffee.
The versatility of this recipe means you can customize it with pandan extract for a Thai-inspired twist or add a hint of vanilla for a more universally appealing flavor. Let’s get baking!
Ingredients for asian coconut cake
Just 11 ingredients for a cake that tastes like tropical heaven—moist crumb and toasted coconut layers.
| Ingredient | Amount | Notes |
|---|---|---|
| All-Purpose Flour 🌾 | 2 cups | Sifted for light texture |
| Coconut Milk 🥥 | 13 ½ oz | Full-fat canned, unsweetened |
| Granulated Sugar 🍚 | 1 ½ cups | White or light brown |
| Unsalted Butter 🧈 | 1 cup | Melted, full-fat preferred |
| Large Eggs 🥚 | 4 whole | Room temperature |
| Baking Powder 🍞 | 2 tsp | Aluminum-free preferred |
| Salt 🧂 | ½ tsp | Fine sea salt |
| Vanilla Extract 🌿 | 1 tbsp | Pure vanilla preferred |
| Toasted Coconut Flakes 🥥 | 1 cup | Unsweetened, lightly toasted |
| Powdered Sugar 🍚 | ½ cup | For glaze |
| Pandan Extract 🌿 | ½ tsp | Optional, for Thai twist |
The coconut milk is where the magic happens—full-fat canned is non-negotiable for that rich texture. Thai Kitchen or Goya brands are my go-tos at the grocery store, but any unsweetened can works. Toasting the coconut flakes in a dry pan until golden (about 3-4 minutes) deepens their flavor—don't skip this step. For the butter, Land O'Lakes unsalted melts beautifully, but any full-fat brand works. The baking powder should be fresh—if it smells like vinegar, toss it. Bob's Red Mill is a reliable brand for this.
No coconut milk? Substitute with equal parts evaporated milk and coconut cream—it's not identical, but close. Swapping vanilla extract for vanilla bean paste adds flecks of flavor. For a nutty depth, toasted sesame oil (1/2 tsp) in the batter works surprisingly well. The pandan extract? If you can't find it, skip it or use 1/4 tsp almond extract—just know it'll taste different. Pre-shredded coconut? Toast it first—it makes a world of difference. The powdered sugar glaze can be made with confectioners' sugar from the grocery store, but sifting it first ensures a smoother finish.
This cake stays moist for 5 days in an airtight container at room temperature. For longer storage, wrap tightly and refrigerate for up to 1 week. Freeze portions for 3 months—thaw at room temperature before serving. I always bake an extra pan because it makes the best coconut cake French toast the next morning. Store the toasted coconut flakes in a sealed container to keep them crisp for up to 2 weeks. The batter can be prepped ahead and refrigerated for 24 hours—just let it sit at room temp before baking.
Why You'll Love This Recipe
- No Mixer Needed: I swear by this recipe when I’m too tired to cream butter and sugar by hand. Just melt the butter, mix in the coconut milk and sugar, then fold in the flour and eggs—no stand mixer, no fuss. The cake still turns out tender and moist, like it was baked by someone who actually enjoys their kitchen.
- Tropical Comfort: That first bite of warm coconut cake—slightly caramelized edges, a soft crumb, and that creamy coconut milk flavor—feels like a hug. It’s not overly sweet, either; the butter and eggs balance it perfectly, so it’s rich without being heavy. Honestly, I’ve never met a cake that makes me reach for seconds faster.
- Birthday to Brunch: This cake is my go-to for celebrations and lazy mornings. For birthdays, I top it with toasted coconut flakes and a drizzle of honey. For breakfast? Slice it up, toast it lightly, and serve with a dollop of whipped cream—suddenly, you’ve got dessert for dinner and a brunch star. Between us, it’s the only cake I bake that doesn’t feel like a special occasion.
- Pantry-Friendly Magic: I keep all the ingredients on hand—flour, sugar, butter, eggs—and coconut milk is cheap enough that I buy it in bulk. The recipe makes two small cakes or one big one, so leftovers? No problem. I’ll wrap slices in parchment, freeze them, and pull them out for a quick treat later. It’s the kind of recipe that saves me money and time without sacrificing flavor.
Step-by-step instructions for Asian coconut cake
Here's how to create layers of ultra-moist crumb with toasted coconut throughout.
Prepare the Coconut Flour Mixture
In a medium bowl, whisk together the 2 cups all-purpose flour, 2 teaspoons baking powder, and 0.5 teaspoon salt. Sift this dry mixture through a fine-mesh sieve directly into a large mixing bowl to aerate it. This step is crucial for a light, tender crumb that won't be dense.
In a separate bowl, gently fold the 1 cup toasted coconut flakes into the dry flour mixture using a rubber spatula. Distribute them evenly so every bite of cake contains those delightful coconut bits. Set this mixture aside for now—we'll use it in the next step.
Cream Butter and Sugar
In the bowl of a stand mixer fitted with the paddle attachment, combine the 1 cup unsalted butter and 1.5 cups granulated sugar. Beat on medium speed for 3-4 minutes until the mixture is light and fluffy, with a ribbon-like consistency. You'll notice the butter and sugar nearly double in volume and become pale.
This creaming process incorporates air, which creates that signature tender texture. If using your hands, beat with a wooden spoon for 5 minutes until the mixture is smooth and pale. The reason we wait until the mixture is completely smooth is that any remaining butter lumps will create dense pockets in your cake.
Combine Wet Ingredients
Add the 4 whole large eggs one at a time, mixing on low speed for 30 seconds after each addition. Then stir in the 1 tablespoon vanilla extract and 0.5 teaspoon pandan extract (if using) until fully combined. The mixture should be thick and smooth—almost like a thick batter.
Next, gradually pour in the 13.5 ounces coconut milk while mixing on low speed until fully incorporated. The batter should be smooth and slightly thick, like a well-made cake batter. If it's too thick, add 1-2 tablespoons of milk to reach the right consistency. This step ensures the cake will be moist and tender rather than dry.
Fold in Dry Ingredients
With the mixer on low speed, gradually add the dry flour mixture in three parts, mixing just until combined after each addition. Be careful not to overmix—stop as soon as the flour disappears. Overmixing develops gluten, which can make the cake tough instead of tender.
Once fully combined, the batter should be thick but pourable. If it's too thick, add 1-2 tablespoons of milk to loosen it. The batter should coat the back of a spoon but still hold its shape when lifted. This consistency ensures the cake will rise properly and have that signature moist crumb.
Bake the Cake Layers
Preheat your oven to 350°F. Grease and flour two 8-inch round cake pans, then line the bottoms with parchment paper. Divide the batter evenly between the pans. Bake for 25-30 minutes, or until a toothpick inserted into the center comes out clean.
I like to check for doneness at the 25-minute mark—the cake should spring back when gently pressed in the center. Let the cakes cool in the pans for 10 minutes, then transfer to a wire rack to cool completely. This cooling step is essential to prevent the layers from becoming soggy when assembling.
Assemble and Glaze
Once the cakes are completely cool, place one layer on a serving plate. Spread a thin layer of 1 tablespoon coconut milk over the top to help the glaze stick. Dust the layer evenly with 0.25 cup powdered sugar, then sprinkle 0.25 cup toasted coconut flakes over the top.
Repeat with the second layer, then dust the top layer with the remaining 0.25 cup powdered sugar and 0.25 cup toasted coconut flakes. For extra shine, brush the sides of the cake with a little more coconut milk. Serve immediately or refrigerate for 1 hour before serving for a firmer texture.
Pro Tips For Making Asian Coconut Cake
- Whisk Eggs Until Ribbon Stage: The batter for this cake relies on air—don’t just mix the eggs until they look combined. Whisk them until the ribbons hold for 2-3 seconds when you lift the whisk. I learned this the hard way when my first batch turned out dense; the difference in texture is night and day.
- Chill the Batter: Let the coconut milk and egg mixture sit for 10 minutes before folding in the flour. Cold ingredients blend better and prevent a gummy texture. I skip this when I’m impatient, but the cake is noticeably lighter when I do.
- Use Full-Fat Coconut Milk: Light coconut milk won’t give the same richness—stick to the canned, full-fat version. The fat keeps the crumb tender and the flavor vibrant. (Yes, even if you’re watching calories, this is the thing that matters most.)
- Bake in Two Stages: Start at 350°F (175°C) for 20 minutes, then drop to 325°F (160°C) for the last 25-30. This prevents a domed top or over-browning. After burning three batches, I finally figured out the oven’s hot spots aren’t your friend here.
Common mistakes when making perfect results
Overmixing the Batter
This is the #1 mistake I see that turns tender cake into dense brick. Once you add the dry ingredients, mix just until combined—about 10-15 strokes with a spatula.
Overmixing develops gluten, which creates a tough, chewy texture instead of that signature Asian coconut cake crumb. I always stop mixing when the last traces of flour disappear. 🌾
Skipping Toasted Coconut
Using raw coconut flakes directly from the bag? Big mistake. Toasting them in a dry pan for 3-4 minutes until golden deepens their flavor and adds that essential crunch.
Raw coconut lacks the nutty aroma that makes this cake special. I toast mine in batches to avoid burning—just keep an eye on them. 🥥
Incorrect Oven Temperature
Baking at 325°F instead of 350°F will give you underbaked, gummy layers. Too hot (375°F+) causes the outside to burn before the center sets. Use an oven thermometer to confirm your oven's actual temperature—many run 25°F hotter than set. I always preheat for 15 minutes before baking. 🌡️
Using Low-Quality Coconut Milk
Don't grab just any can of coconut milk—full-fat, unsweetened is non-negotiable. Light versions or sweetened versions will make your cake taste artificial. Brands like Thai Kitchen or Goya give the richest flavor. I've tried substitutes like coconut cream, but nothing matches the authentic texture. 🥥
Not Cooling Properly
Transferring cakes to the rack too soon causes them to collapse. Let them cool in pans for 10 full minutes first. This helps set the structure before assembly. I also recommend wrapping cooled layers in plastic wrap before refrigerating—they stay moist longer this way. ❄️
Glaze Application Mistakes
Dusting powdered sugar directly on the cake without a binder makes it clump. Always brush with 1 tbsp coconut milk first to help the sugar stick evenly. I also recommend sifting the powdered sugar through a fine-mesh sieve for a smoother finish. 🍚
Nutrition facts
Frequently asked questions
Can I make this cake without coconut milk?
For the best texture and flavor, I recommend using full-fat coconut milk, but you can substitute with 1 cup evaporated milk + 1 cup coconut cream if needed. The cake will still be moist, though the coconut aroma will be less pronounced. For a non-dairy alternative, try 1.5 cups oat milk + 1 tbsp coconut oil—just know the texture may be slightly denser.
How do I store leftovers to keep them moist?
Wrap individual layers tightly in plastic wrap and store in an airtight container at room temperature for up to 5 days. For longer storage, refrigerate for 1 week or freeze for 3 months. To refresh, let it sit at room temperature for 30 minutes before serving. The key is preventing air exposure—it's the enemy of moisture!
What's the best way to add extra coconut flavor?
For a more intense coconut taste, add 1 teaspoon coconut extract with the vanilla, or fold in an extra 0.25 cup toasted coconut flakes into the batter. You can also brush the layers with 2 tbsp coconut cream before adding the glaze. For a tropical twist, top with fresh mango slices or lychee sauce after baking.
Why did my cake turn out dense instead of light?
This usually happens from overmixing the batter or using old baking powder. Mix just until combined (10-15 strokes max) and make sure your baking powder is fresh (it should smell neutral). Also check your oven temperature—many run 25°F hotter than set. For extra lightness, sift your flour before mixing.
Can I make this cake in a different shape?
This recipe works perfectly for 9-inch round pans (bake 30-35 minutes) or even a 9x13-inch baking dish (bake 35-40 minutes). For cupcakes, divide batter into 24 lined cups and bake at 350°F for 18-20 minutes. Just reduce baking time by 2-3 minutes per inch of height. The same batter works beautifully in any shape!