
Desserts
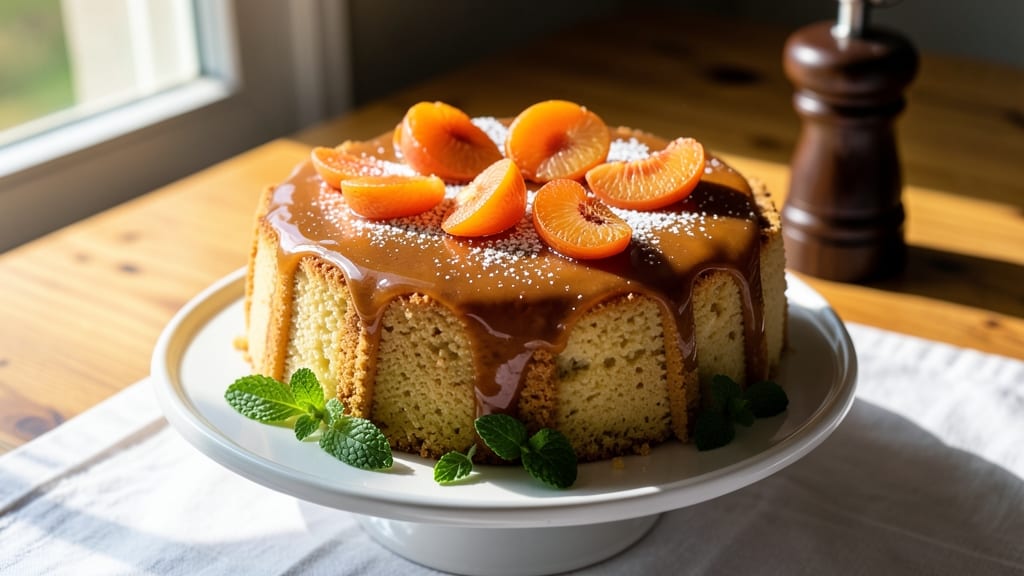
This apricot yogurt cake delivers moist, tender layers with bursts of tangy-sweet apricot jam that make every slice feel like a hug. 💛 The secret lies in Greek yogurt's moisture-retaining magic and a simple folding technique that keeps the jam distributed perfectly throughout.
I've perfected this recipe over years of baking competitions, where it consistently earned top marks for texture and flavor balance.
The cake's beauty comes from its simplicity—just a few pantry staples and one key technique. Greek yogurt replaces some butter, creating a lighter crumb while maintaining richness, while the apricot jam adds natural sweetness without overpowering.
The folding method ensures those jammy pockets stay intact through baking, giving you that restaurant-quality texture at home.
What you'll end up with is a cake that's impossibly tender yet sturdy enough to hold slices without crumbling. The top stays beautifully golden while the interior remains moist and fluffy, with just the right amount of jam peeking through.
Each bite delivers that perfect balance of tangy yogurt and sweet apricot, making it a crowd-pleaser that disappears faster than you can say "second slice."
Perfect for spring brunch, summer picnics, or anytime you crave something comforting yet elegant. The recipe scales beautifully too—whether you're baking for a crowd or just treating yourself. Let's get baking this apricot yogurt cake that's sure to become your new signature dessert.
Ingredients for apricot yogurt cake
The perfect blend of tangy yogurt and sweet apricot jam creates this restaurant-worthy cake.
| Ingredient | Amount | Notes |
|---|---|---|
| Plain Greek Yogurt 🧀 | 1 cup | Full-fat for best moisture |
| Unsalted Butter 🧈 | ½ cup | Softened, room temperature |
| Granulated Sugar 🍚 | 1 ½ cups | Superfine preferred for smoothness |
| All-Purpose Flour 🌾 | 2 cups | Sifted, no substitutions |
| Baking Powder 🧂 | 2 tsp | Freshly measured |
| Vanilla Extract 🌿 | 1 tbsp | Pure, high-quality |
| Large Eggs 🥚 | 2 whole | Room temperature |
| Apricot Jam 🍑 | ¾ cup | Seedless, good quality |
| Milk 🥛 | ½ cup | Whole milk preferred |
| Lemon Zest 🍋 | 1 tbsp | Freshly grated |
| Salt 🧂 | ½ tsp | Fine sea salt |
| Powdered Sugar 🍚 | ¼ cup | For dusting top |
Greek yogurt is the star here—full-fat keeps the cake moist without being heavy. Fage or Siggi's are my go-tos for that thick, tangy texture, but any plain Greek yogurt works. The jam? Mott's or Bonne Maman are reliable, but any seedless jam will do. Fresh lemon zest brightens everything, so grab a bright yellow lemon from the produce section—the more vibrant, the better. For the flour, sift it first to avoid dense layers, and don't skip the baking powder; this is what gives the cake its lift.
No Greek yogurt? Plain yogurt thinned with milk works in a pinch, but the texture won't be as tender. Substituting butter with oil? Apoil yogurt (yogurt + oil) mimics the richness, but the cake will be slightly denser. For the jam, if you can't find seedless, strain it yourself—no one wants a mouthful of pits. The vanilla extract should smell potent; if it's faint, double the amount. And if you're worried about the cake being too sweet, trust the process—the yogurt and lemon zest balance it perfectly.
This cake keeps beautifully—covered at room temperature for 2 days or 3 days in the fridge. For longer storage, wrap tightly and freeze for up to 2 months. The best part? It reheats wonderfully—30 seconds in the microwave brings back that moist texture. I always bake an extra batch; the slices reheat perfectly for breakfast the next morning. Dust with powdered sugar right before serving—that's the secret to restaurant-quality presentation.
Why You'll Love This Recipe
- No Mixer Needed: I swear by this batter—just fold the yogurt and butter until it’s almost smooth, then dump in the dry stuff. No electric mixer, no fuss, and the texture still turns out tender as can be.
- Tangy-Sweet Magic: That Greek yogurt keeps it light, while the apricots (if you add them!) bring a jammy depth that’s impossible to resist. Honestly? The first bite makes me forget it’s cake—it’s more like a cross between dessert and something my grandma would’ve served with tea.
- Weeknight Hero: Slice it warm for breakfast, pack it for lunch, or serve it at a picnic—this cake handles everything. Between us, I’ve even reheated leftovers in the toaster and called it a "cake waffle." (Don’t judge.)
- Pantry-Friendly Budget Win: Five ingredients, zero weird substitutions. The yogurt adds moisture without extra fat, the butter keeps it rich, and the sugar? Well, you can cut it by a third if you’re watching. My kids beg for seconds, and my wallet stays happy.
Step-by-step instructions for apricot yogurt cake
Here's how to create layers of tender cake with jam-soaked goodness—no dry crumbs in sight.
👨🍳 Step 1: Whisk Wet Ingredients for Perfect Texture
In a large mixing bowl, combine the 1 cup plain Greek yogurt, 0.5 cup softened unsalted butter, and 1.5 cups granulated sugar. Whisk on medium speed for 2-3 minutes until smooth and slightly thickened. You're looking for a ribbon consistency—the mixture should coat the back of a spoon and leave a trail when you lift the whisk.
This step is crucial for moisture. The yogurt keeps the cake tender, while the butter creates that delicate crumb. If your butter isn't softened, melt it first and let it cool slightly—cold butter won't mix properly and can create lumps. Here's the thing—don't overmix or you'll develop gluten and end up with a tough cake.
👨🍳 Step 2: Add Eggs and Aromatics for Depth of Flavor
Add the 2 whole eggs, 1 tbsp vanilla extract, 1 tbsp lemon zest, and 0.5 tsp salt to the wet mixture. Whisk gently until just combined—about 30 seconds. The lemon zest adds a bright citrus note that balances the sweetness of the jam, while the vanilla enhances the apricot flavor.
I always use room-temperature eggs for even mixing. If yours are cold, let them sit in warm water for 5 minutes before adding. The mixture should now be pale yellow with a smooth, creamy texture. If it looks too thick, add 1-2 tablespoons of milk to help with mixing—this is the only time you'll add milk to the wet ingredients.
👨🍳 Step 3: Fold in Dry Ingredients Gently
In a separate bowl, sift together the 2 cups all-purpose flour and 2 tsp baking powder. This sifting step prevents lumps and ensures even distribution of leavening. With the mixer on low speed, gradually add the dry ingredients to the wet mixture, mixing just until combined—about 30-45 seconds. Stop mixing as soon as you see no more flour streaks.
Overmixing develops gluten, which makes cakes tough. You'll know you've gone too far when the batter becomes elastic. The perfect consistency should be like thick pancake batter—smooth but not stiff. If you're making two layers, divide the batter evenly between two 8-inch round cake pans lined with parchment paper.
🍳 Step 4: Bake Until Golden and Springy
Preheat your oven to 350°F. Pour the batter into the prepared pans and bake for 25-30 minutes, or until a toothpick inserted in the center comes out clean and the tops are golden brown. The edges should pull away slightly from the pan, and the cake should spring back gently when pressed in the center.
Don't open the oven during baking—this causes the cakes to sink. If the tops brown too quickly, loosely tent with aluminum foil after 15 minutes. Let the cakes cool in the pans for 10 minutes before transferring to a wire rack to cool completely. This resting period prevents cracking as they cool.
🥘 Step 5: Assemble with Jam and Powdered Sugar
Once both layers are completely cool, spread 0.75 cup apricot jam evenly over the first layer. I use a small offset spatula for smooth, even coverage. Place the second layer on top and gently press down to create a clean edge. The jam should ooze slightly at the sides—this is what makes this cake special.
Dust the top generously with 0.25 cup powdered sugar using a fine-mesh sieve for an elegant finish. For extra moisture, you can brush the sides of the cake with a simple syrup made by heating 0.25 cup water with 0.25 cup sugar until dissolved, then cooling. This step isn't necessary but adds an extra layer of tenderness.
Pro Tips For Making Apricot Yogurt Cake
- Fold the yogurt right: Mix the wet ingredients until just combined, then gently fold in the flour—don’t overmix. I used to beat this like a smoothie, and the cake turned dense and rubbery. Stop when there are a few dry spots; the baking powder will do its work.
- Use room-temperature butter: Cut the butter into small cubes and let it sit at room temp for 30-60 minutes before creaming. Cold butter creates pockets that won’t emulsify properly, and you’ll end up with a cake that’s more like a brick. (Yes, even if you’re impatient like me.)
- Don’t overbake the layers: Check the cake with a toothpick at 325°F—it should come out with moist crumbs, not dry ones. Overbaking turns the yogurt base gummy and the texture sad. If the top browns too fast, tent it with foil early.
- Swap half the flour for cake flour: If you’re serious about tenderness, replace ½ cup of the all-purpose flour with cake flour. The lower protein content keeps the crumb light, especially when you’re mixing in yogurt—which can make cakes tough if not handled right. (I skip this when I’m lazy, but the difference is noticeable.)
Troubleshooting your apricot yogurt cake
Dense Cake Texture
If your cake turns out dense instead of light and fluffy, you likely overmixed the batter or used cold ingredients. The key is to mix the dry ingredients into the wet mixture just until combined—no more than 30-45 seconds on low speed.
Also, ensure your eggs and butter are room temperature before mixing. Cold ingredients slow down the chemical reactions needed for proper leavening. 💡
Another common cause is using too much flour. Weigh your flour using a kitchen scale for accuracy—2 cups by volume can actually weigh 220-240 grams, depending on how tightly it's packed.
If you don't have a scale, spoon the flour into the measuring cup and level it off with a knife for consistent results.
Dry or Cracked Top
A dry or cracked top usually means the cake baked too long or the oven was too hot. Remove your cake from the oven when a toothpick comes out with moist crumbs (not wet batter).
If the top is browning too quickly, tent the pans with aluminum foil after 15 minutes of baking. For extra insurance, try baking at 325°F instead of 350°F—this gives the center time to cook while preventing over-browning.
If your cake cracks after baking, it likely cooled too quickly. Let the cakes cool in their pans for 10-15 minutes before transferring to a wire rack. This gradual cooling helps prevent sudden temperature shifts that cause cracks.
You can also brush the tops with a simple syrup (equal parts sugar and water, heated until dissolved) right after baking to add moisture and prevent dryness.
Jam Not Distributing
If the apricot jam pools in one spot instead of spreading evenly, your layers may not be level. Use a serrated knife to trim any domed tops before spreading the jam.
For even distribution, spread the jam in three thin layers—first a thin layer, then the second cake layer, then another thin layer of jam, and finally the top layer.
Press gently but firmly to create a clean edge and ensure the jam oozes slightly at the sides for that signature look. 🍑
Another trick is to warm the jam slightly before spreading—microwave for 10-15 seconds to make it more fluid. This helps it spread more evenly and prevents clumping. If you're worried about the jam making the cake soggy, make sure your layers are completely cool before assembling.
Warm layers will melt the jam and create a runny center.
Soggy Bottom Layers
Soggy bottom layers often happen when the cake is overbaked or the pan isn't properly prepared. Always line your 8-inch round cake pans with parchment paper and grease them lightly with butter or baking spray.This prevents the cake from sticking and ensures even baking. If you notice the bottoms are browning too quickly, reduce the oven temperature by 25°F and check for doneness a few minutes early.
For extra insurance, try blind-baking the pans for 5 minutes at 350°F before adding the batter. This pre-bakes the bottom slightly, creating a barrier that prevents sogginess.
If your cake still turns out too moist, you can place the assembled cake on a wire rack over a baking sheet and bake at 300°F for 10-15 minutes—this helps set the layers without drying them out completely.
Nutrition facts
Frequently asked questions
Why does this recipe use Greek yogurt instead of regular yogurt?
Greek yogurt creates a moist, tender crumb because its thick texture retains more moisture during baking. Regular yogurt would make the cake denser. The tanginess also balances the sweet apricot jam beautifully. For a lighter texture, always use full-fat Greek yogurt—it's worth the extra cost for this recipe!
Can I substitute apricot jam with another fruit preserve?
Yes, but choose preserves with similar thickness and sweetness. Strawberry, raspberry, or peach jam work well—just adjust the amount slightly if your preserve is thicker. Avoid chunky preserves like blueberry, as they won't distribute evenly. For a tangy twist, try lemon curd instead of jam!
How do I keep the cake moist for more than 2 days?
Store it in an airtight container at room temperature for 2 days, or refrigerate for 3-4 days. For longer storage, wrap tightly and freeze for up to 2 months. To serve, let it sit at room temperature for 30 minutes before slicing. A quick 10-second microwave reheat restores moisture perfectly!
What's the secret to preventing cracks in the cake?
Let the cakes cool in their pans for 10-15 minutes before transferring to a rack. This gradual cooling prevents sudden temperature shifts. Also, don't overbake—remove when a toothpick comes out with moist crumbs. For extra insurance, brush warm cakes with simple syrup (equal parts sugar and water) right after baking.
Can I make this cake in a different pan size?
Yes, but adjust baking time. For a 9-inch pan, reduce time by 3-5 minutes (bake 22-25 minutes at 350°F). For a 6-inch pan, increase time by 5-7 minutes. Always check doneness with a toothpick. The key is to bake until the center is set but still slightly springy—overbaking dries out yogurt cakes quickly.