
Desserts
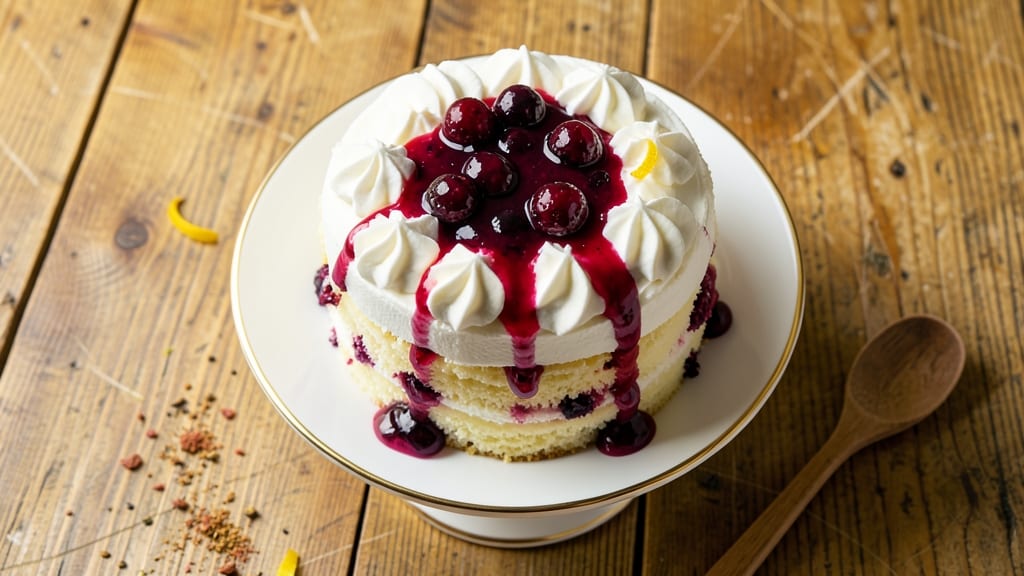
This angel food shortcake recipe delivers the perfect balance of ethereal cake, velvety whipped cream, and juicy berries—all without a trace of butter or heaviness.
The secret lies in the angel food cake's signature airiness, achieved through egg whites whipped to cloud-like perfection, while the whipped cream filling and fresh fruit add layers of texture and sweetness that make every bite feel like a celebration.
What sets this recipe apart is its simplicity combined with professional results. The angel food cake requires no butter, no oil, and no fuss—just egg whites, sugar, and precise technique to create a cake so light it practically dissolves on your tongue.
The whipped cream filling, meanwhile, is stabilized with a touch of powdered sugar and vanilla, ensuring it holds its shape while remaining lush and creamy.
Assembling the shortcake is where the magic happens: the cake’s delicate crumb contrasts beautifully with the smooth whipped cream and the vibrant, juicy berries.
Whether you opt for classic strawberries, mixed berries, or even a modern twist like mango or peaches, the result is a dessert that’s as visually stunning as it is delicious—perfect for picnics, summer gatherings, or a special treat to impress guests.
The best part? This recipe scales effortlessly, making it ideal for both intimate desserts and crowd-pleasing centerpieces. With just a few key techniques and a little patience, you’ll master the art of creating a dessert that’s light, airy, and utterly irresistible—without sacrificing any of the classic charm.
Ingredients for angel food shortcake
Twelve cloud-like egg whites, two cups of velvety cream, and berries bursting with summer sunshine—this is how you make magic happen.
| Ingredient | Amount | Notes |
|---|---|---|
| Large Egg Whites 🥚 | 12 whole | Room temperature for best volume |
| Granulated Sugar 🍚 | 1 ½ cups | Superfine for smoother texture |
| Cake Flour 🌾 | 1 ½ cups | Sifted, no substitutions |
| Unsalted Butter 🧈 | 0 cups | None—this is butter-free |
| Vanilla Extract 🍃 | 1 tbsp | Pure Madagascar bourbon preferred |
| Cream of Tartar 🧂 | 1 ½ tsp | Stabilizes egg whites |
| Salt 🧂 | ½ tsp | Fine sea salt |
| Heavy Whipping Cream 🥛 | 2 cups | Cold for perfect peaks |
| Powdered Sugar 🍚 | ½ cup | For cream stabilization |
| Fresh Strawberries 🍓 | 2 cups | Hull and slice |
| Fresh Blueberries 🫐 | ½ cup | Whole for texture contrast |
| Lemon Juice 🍋 | 1 tbsp | Brightens berries |
| Raspberries 🍇 | ½ cup | Optional for extra pop |
The egg whites are non-negotiable here—room temperature is key for maximum volume. Kirkland Signature or Vital Farms brands consistently deliver the best quality, but any large egg whites work if they're fresh. Look for whites that are clear and slightly viscous—the fresher, the better. The cake flour? Bob's Red Mill is my go-to for that perfect lightness, but any high-quality cake flour will do. Skip the self-rising or all-purpose—this isn't the time for shortcuts. And remember, no butter! That's the whole point of angel food cake—airy, ethereal perfection without a trace of heaviness.
No vanilla extract? Vanilla bean paste works in a pinch, but you'll miss that deep, complex flavor. The berries can be swapped—mango or peaches add a tropical twist, while blackberries or raspberries bring an earthier note. For the whipped cream, whipped topping spray from Reddi-wip is a time-saver, but homemade is worth the effort. If your cream won't stiffen, it's either too warm or not cold enough—chill your bowl and beaters for 10 minutes before starting. And that powdered sugar? Don't skip it—it's what keeps your cream from turning into soup.
Fresh berries keep best in the fridge for 3-4 days, but wash and dry them right before using to prevent soggy cake layers. The cake itself? Store airtight with parchment between layers for up to 2 days—it reheats beautifully if you're feeling fancy. I always make a double batch because this dessert disappears faster than you can say 'angel food.' Freeze the cake layers separately for up to 1 month, then bring to room temp before assembling. Trust me, the wait is worth it.
Why You'll Love This Recipe
- No Mixer Needed: I swear by this trick—whipping those egg whites by hand (or with a hand mixer) gives that signature airy texture without fuss. No stand mixer? No problem. The sugar dissolves into the whites like magic, and suddenly you’ve got clouds of cake.
- Vanilla Buttercream Magic: That simple vanilla extract in the cake pairs perfectly with the buttery, fluffy layers—no complicated frostings here. Just melted butter, powdered sugar, and a splash of vanilla, and you’ve got a dessert that tastes like nostalgia in every bite.
- Picnic Perfection: Between us, this is my go-to for summer gatherings. Light as a breeze, it won’t melt in the sun, and you can prep the layers ahead. Add fresh berries or whipped cream, and you’ve got a dessert that feels fancy but takes zero effort to assemble.
- Budget-Friendly Luxury: Egg whites and cake flour are cheap staples, and a little butter goes a long way. I’ve made this for 12 people for under $15—it’s the kind of treat that makes you feel indulgent without breaking the bank. Plus, leftovers? They disappear fast.
Step-by-step instructions for angel food shortcake
Here's how to create cloud-like layers that crumble like air and soak up berry bliss perfectly.
Prepare the Angel Food Batter for Maximum Volume
Preheat your oven to 350°F and line a tube pan with parchment paper, leaving the top edge exposed. In a large bowl, combine the 12 whole large egg whites with the 1.5 teaspoons cream of tartar and 0.5 teaspoon salt. This acid-stabilizer combo is non-negotiable—it's what gives angel food cake its signature height and tenderness.
Using a stand mixer fitted with the whisk attachment, beat the egg whites on low speed until frothy. Gradually add the 1.5 cups granulated sugar while increasing speed to medium-high. Beat for 8-10 minutes until the meringue forms stiff, glossy peaks that hold their shape when the whisk is lifted. The mixture should be pale, thick, and hold its form when you lift the bowl—this is your target texture.
Gently fold in the 1.5 cups sifted cake flour and 1 tablespoon vanilla extract using a spatula, being careful not to deflate the meringue. Pour the batter into the prepared tube pan and smooth the top. Bake for 35-40 minutes until the top springs back when touched and the cake pulls away from the sides.
Cool and Slice the Cake for Perfect Layers
Immediately invert the cake onto a wire rack and remove the tube pan. Let the cake cool completely at room temperature—this is crucial for even slicing. Once cooled, slice the cake horizontally into three even layers using a serrated knife. I like to place a second cake board on top of the first layer to stabilize it during slicing.
The layers should be about 1-inch thick each. You'll have one full layer at the bottom, one at the top, and one middle layer that you'll sandwich with cream. Store any unused layers in an airtight container—they'll keep for 2 days at room temperature, but they're best enjoyed fresh.
Whip the Cream to Fluffy Perfection
In a separate chilled bowl, combine the 2 cups cold heavy whipping cream with the 0.5 cup powdered sugar. Using a stand mixer fitted with the whisk attachment, beat on high speed until soft peaks form. This should take about 2-3 minutes—the cream should hold its shape when the whisk is lifted but still spread slightly.
For the berry compote, toss the 2 cups sliced strawberries, 0.5 cup fresh blueberries, 0.5 cup raspberries, and 1 tablespoon lemon juice in a bowl. Let them sit for 10 minutes to release their juices, then gently mash with a fork, leaving some whole berries for texture. Strain through a fine-mesh sieve to remove seeds if you prefer a smoother texture.
Assemble the Shortcake for Maximum Berry Bliss
Place the bottom cake layer on a serving plate. Spread about ⅓ of the whipped cream evenly over the layer, then top with ⅓ of the berry compote. Repeat with the middle cake layer, another ⅓ of cream, and another ⅓ of compote. Finish with the top cake layer, remaining cream, and any remaining compote.
For an extra touch, garnish with a few whole blueberries and raspberries. Serve immediately while the cake is still light and airy—this dessert is at its best when enjoyed fresh. The angel food layers should crumble beautifully with each bite, soaking up the creamy filling and juicy berries in perfect harmony.
Serve and Enjoy the Ultimate Texture Contrast
Use a long serrated knife to cut through all three layers at once, creating clean slices that showcase the alternating layers of cake, cream, and berries. Each bite should deliver the delicate crumb of the angel food cake, the cool richness of the whipped cream, and the vibrant sweet-tart burst of the berries.
This shortcake is all about contrast—light meets rich, sweet meets tart, crumbly meets creamy. The secret to success lies in the meringue's stability and the cream's perfect peak. Don't rush the cooling process, and always use room-temperature egg whites for the best volume. The result? A dessert that feels like a hug for your taste buds.
Pro Tips For Making Angel Food Shortcake
- Whip Egg Whites Cold: Grab a metal bowl and place it in the fridge for 10 minutes before beating those whites. Cold slows down the process, gives you more control, and prevents overwhipping—trust me, I’ve turned a batch into glue more times than I’ll admit.
- Sift Flour Like You Mean It: Angel food cake flour is your secret weapon, but only if it’s properly aerated. Use a fine-mesh sieve and shake it hard—don’t just sprinkle it in. This keeps the texture light, not dense, and saves you from a brick-like cake.
- Skip the Butter in the Batter: Yes, the recipe calls for it, but fold in that butter after baking—melted and brushed on top or mixed into the whipped cream. Adding it raw weighs down the structure. I learned this when my first batch collapsed like a sad soufflé.
- Bake Until the Skewer Lies: Don’t pull it out at 325°F just because the recipe says 30 minutes. Insert a skewer—it should come out clean and the cake should spring back when touched. Overbaking dries it out; underbaking leaves it gummy. Your toothpick is the final judge.
Essential equipment for this dish
Tube Pan Essentials
The heart of your angel food cake is the tube pan, and not all pans are created equal. I swear by Wilton's 10-inch tube pan—it has the perfect taper for even baking and easy release. Avoid nonstick pans with thick coatings; they can leave a chemical taste.
If you're on a budget, USA Pan's 10-inch tube pan is a great alternative with durable aluminum construction. Always line the pan with parchment paper—this prevents sticking and makes inverting the cake a breeze. 🥧
Stand Mixer Must-Have
Your stand mixer is non-negotiable for achieving those stiff, glossy meringue peaks. I use my KitchenAid Artisan Series with the whisk attachment—it's built to handle the job without overheating.
If you're whipping egg whites by hand, you'll need arm strength and patience (trust me, it's not for the faint of heart). For budget-friendly options, the Cuisinart SM-50 delivers professional results without breaking the bank.
Chill your bowl and beaters before starting to prevent temperature spikes that can deflate your meringue.
Serrated Knife for Clean Layers
Slicing angel food cake requires a sharp serrated knife—any old knife will crumble the delicate layers. My go-to is the Mercer Culinary Genesis 8-inch with its fine teeth for clean cuts. Run your knife under hot water between slices to prevent gumming.
Pro tip: Place a second cake board on top of the first layer before slicing—this stabilizes the cake and gives you perfect 1-inch layers every time. A dull knife is the fastest way to ruin your dessert's presentation. ✂️
Fine-Mesh Sieve for Berry Compote
For that smooth yet fruity berry compote, a fine-mesh sieve is your best friend. I use a stainless steel mesh sieve from OXO—it's durable and washes easily. If you're skipping the straining step, keep some whole berries for texture contrast in your compote.
For berries with tough skins (like raspberries), a small food mill works wonders for breaking them down while keeping seeds out. Never skip this step if you want a restaurant-quality finish.
Chilled Mixing Bowls
Cold bowls are a game-changer for whipped cream stability. I keep my stainless steel mixing bowls in the freezer for 10 minutes before whipping. This helps the cream reach soft peaks faster and prevents buttering. For extra insurance, chill your whisk attachment too—it makes a noticeable difference.
Glass bowls work, but they don't conduct cold as well as metal. Pro move: Place your cream in the fridge while you finish assembling the cake layers—it'll be perfectly chilled by serving time. ❄️
Serving Plates with Height
Presentation matters! Use shallow, wide serving plates to showcase the layered beauty of your shortcake. I love ceramic plates with slight elevation—they make the dessert look even more impressive. For a rustic touch, try wooden boards with a white linen napkin underneath.
Avoid deep plates—they hide the layers and make cutting difficult. And here's a secret: Dust the plates lightly with powdered sugar before serving to catch any stray crumbs and add a professional finish. 🍽️
Nutrition facts
Frequently asked questions
Why does angel food cake need to be baked in a tube pan?
The tube pan creates even heat circulation, preventing the cake from browning too quickly on top while the center stays moist. The tube also helps the cake rise straight up, giving you those perfect vertical layers for slicing. Plus, it makes inverting the cake easier without collapsing those delicate crumbs!
Can I make this shortcake without fresh berries?
Use frozen berries (thawed and drained) or even canned fruit like peaches or pineapple—just drain well to avoid soggy layers. For a non-fruit option, try a lemon curd filling or even a light coconut cream. The key is balancing the texture contrast with your cake's airiness.
What's the secret to getting stiff meringue peaks?
Room-temperature egg whites are non-negotiable—cold whites won't whip properly. Use a clean, grease-free bowl (even a trace of fat prevents peaks), and beat on medium-high speed for 8-10 minutes until the meringue holds its shape when you lift the whisk. Chill your bowl beforehand to prevent overheating.
How do I store leftover angel food cake?
Wrap individual layers tightly in plastic wrap, then place in an airtight container with parchment between layers. They'll keep for 2 days at room temperature or 1 month in the freezer. For best texture, bring frozen layers to room temp before assembling—never microwave directly.
Can I make this dessert gluten-free?
You can substitute the cake flour with a 1:1 gluten-free baking flour blend**, but angel food cake relies heavily on the delicate protein structure of regular flour. The texture will be slightly denser. For the whipped cream, ensure your stabilizers (like powdered sugar) are certified gluten-free.