
Desserts
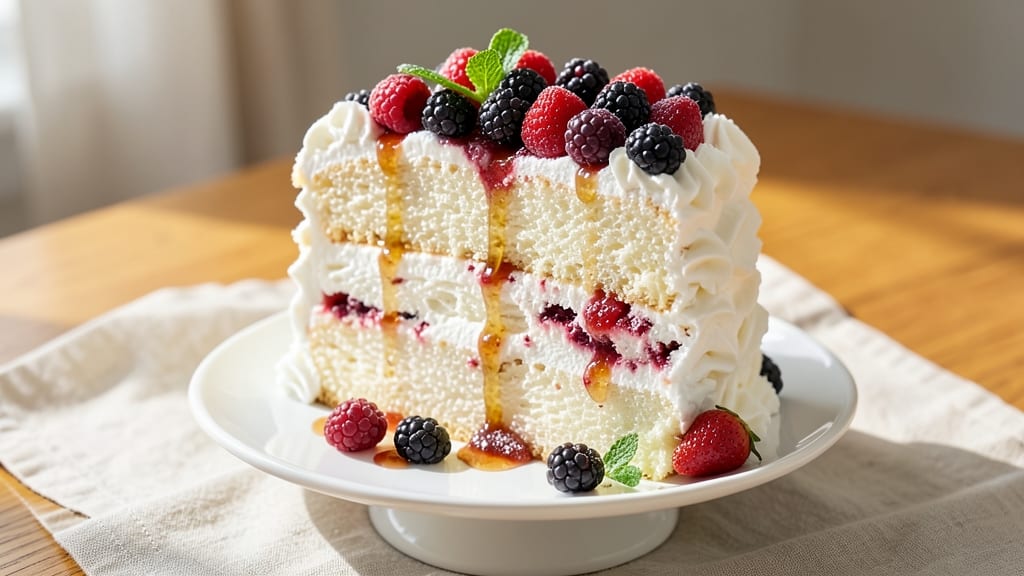
This angel food cake with berries recipe delivers the perfect balance of ethereal lightness and vibrant freshness—no butter or oil needed. The secret lies in whipped egg whites that create a cloud-like texture, while fresh berries add natural sweetness and a stunning visual contrast.
I've perfected this technique over years of baking, ensuring every slice is moist yet airy, with berries that stay vibrant and juicy.
The traditional method calls for only six ingredients, including cake flour and cream of tartar, which stabilize the egg whites for maximum volume.
What makes this recipe special is the berry preparation—whether you use fresh strawberries, blueberries, or raspberries, they're lightly macerated with sugar to enhance their natural flavors before being layered between cake layers. This approach ensures each bite delivers both the delicate cake and the burst of berry goodness.
By the time you're done, you'll have a dessert that looks as impressive as it tastes—layers of snowy white cake separated by jewel-toned berries, all topped with a dusting of powdered sugar.
The cake stays moist for days when stored properly, making it perfect for special occasions or a weekend treat. The best part? This recipe delivers restaurant-quality results with minimal effort and no heavy cream or butter.
For presentation, consider adding a drizzle of berry coulis or fresh mint leaves between layers, or serving slices on individual plates with a dollop of whipped cream.
The possibilities for customization are endless—try infusing the cake with vanilla or citrus zest, or experimenting with cooked berry compotes for a different texture contrast. Let's create this timeless dessert together.
Ingredients for angel food cake with berries
Six ingredients for the cake, plus fresh berries that make it magical—no butter, no oil, just pure cloud-like perfection.
| Ingredient | Amount | Notes |
|---|---|---|
| Large Egg Whites 🥚 | 12 whole | Room temperature for best volume |
| Granulated Sugar 🍚 | 1 ½ cups | Superfine preferred for smooth texture |
| Cake Flour 🌾 | 1 ½ cups | Sifted, no substitutions |
| Cream of Tartar 🧂 | 1 ½ tsp | Stabilizes egg whites |
| Salt 🧂 | ½ tsp | Fine sea salt preferred |
| Vanilla Extract 🌿 | 1 tbsp | Pure vanilla for authentic flavor |
| Fresh Strawberries 🍓 | 1 ½ lb | Hull and slice for berry layer |
| Fresh Blueberries 🫐 | 1 cup | Rinse and dry for vibrant color |
| Granulated Sugar 🍚 | 2 tbsp | For macerating berries |
| Powdered Sugar 🍚 | ¼ cup | For dusting between layers |
| Lemon Juice 🍋 | 1 tsp | Brightens berry flavor |
The egg whites are non-negotiable here—room temperature is key for maximum volume. Kirkland Signature or Vital Farms pastured eggs work beautifully, but any large eggs will do. Cake flour gives that signature tender crumb, so don't swap for all-purpose (trust me on this). The cream of tartar? It's what stabilizes those egg whites—Bob's Red Mill makes a great brand. For the berries, local farmers markets have the freshest, but grocery store berries work too if they're plump and vibrant. The strawberries should be firm but not hard, and blueberries should be deep blue, not grayish.
No cake flour? All-purpose flour minus 2 tbsp per cup works in a pinch, but the texture won't be quite as light. Fresh berries out of season? Frozen berries work too—just thaw and drain them well. The lemon juice is essential for keeping the berries bright and enhancing their flavor, but if you're allergic, a pinch of orange zest works too. For the sugar, superfine dissolves faster than regular granulated, but pulse regular sugar in a food processor if you're in a hurry. The vanilla extract should be pure—McCormick or Nielsen-Massey are reliable brands that won't break the bank.
This cake is best served the day it's made, but it keeps 3 days in an airtight container at room temperature. For longer storage, slice and freeze between parchment paper for up to 3 months. I like to assemble the cake ahead and refrigerate it overnight—the flavors meld beautifully. The berries can be prepped a day in advance too, just keep them covered. When serving, dust with powdered sugar right before eating so it stays snowy white. And if anyone asks, yes, it's worth the effort—every bite feels like a celebration.
Why You'll Love This Recipe
- No Mixer Needed: I swear by this trick—folding stiff egg whites into sugar with just a whisk gives that signature fluffy texture. No stand mixer, no fuss, and honestly, the result is just as light as anything from a box.
- Berry Magic: The moment those juicy berries sink into the cake? Pure satisfaction. Strawberries, blueberries, or even mixed—it’s like dessert got an upgrade without extra effort. That first bite of tangy-sweet with the airy crumb? Chef’s kiss.
- Brunch Star: Between us, this is my go-to for lazy Sundays. Serve it warm with a drizzle of honey and fresh berries, or slice it cold for a picnic. It’s the kind of cake that feels special without being a production.
- Budget Bright Spot: A single cake feeds six, and the ingredients? Egg whites, sugar, flour—stuff you already have. I’ve made this for birthdays, potlucks, and even my kid’s school bake sale. It’s reliable, pretty, and won’t break the bank.
Step-by-step instructions for angel food cake with berries
Here's how to create a perfectly light cake with a vibrant berry topping that'll impress everyone.
Prepare the Cake Pan and Whisk Egg Whites
Preheat your oven to 350°F and place a rack in the center position. Generously grease a 10-inch tube pan with vegetable oil, then dust it thoroughly with the 1.5 cups cake flour, tapping out any excess. This creates a non-stick barrier that prevents sticking.
In a large, clean mixing bowl, combine the 12 whole large egg whites, 1.5 tsp cream of tartar, and 0.5 tsp salt. Use a hand mixer or stand mixer with the whisk attachment to beat on medium speed for 2 minutes until frothy. This step is crucial—it incorporates air and stabilizes the egg whites for maximum volume.
Gradually Add Sugar and Whip to Stiff Peaks
With the mixer running on medium-high speed, gradually add the 1.5 cups granulated sugar in a slow, steady stream. This prevents graininess and creates a smooth meringue. Whip for 8-10 minutes until the mixture forms stiff peaks that hold their shape when the whisk is lifted.
Here's the thing—you'll know it's ready when the peaks stand straight up and the bowl feels cool to the touch. If you're unsure, test a spoonful by tilting the bowl; the meringue should hold its shape without sliding. Fold in the 1 tbsp vanilla extract at this stage to infuse flavor without deflating the mixture.
Fold in Flour and Bake to Golden Perfection
Using a spatula, gently fold in the 1.5 cups cake flour in three additions, cutting through the center and folding from the bottom up. Be careful not to deflate the batter—just combine until no white streaks remain. Pour the batter into the prepared tube pan and smooth the top with a spatula.
Bake for 30-35 minutes until the top is golden brown and the cake springs back when lightly touched. The cake should pull away cleanly from the sides of the pan. I like to tap the pan gently—if it sounds hollow, it's done. Let it cool in the pan for 10 minutes before inverting onto a wire rack to cool completely.
Prepare the Berry Topping
While the cake cools, prepare the berry layer. Hull and slice the 1.5 lb fresh strawberries into ¼-inch thick pieces. In a medium bowl, toss the strawberries and 1 cup fresh blueberries with the 2 tbsp granulated sugar and 1 tsp lemon juice. Let this mixture sit for 15 minutes to macerate, releasing juices that will create a vibrant, flavorful topping.
Real talk: the berries should look glossy and slightly softened by the time you're ready to assemble. This ensures they release their juices beautifully when layered with the cake. Drain any excess liquid from the berries before using, reserving 2 tablespoons for brushing between layers if desired.
Assemble and Dust with Powdered Sugar
Once the cake is completely cool, slice it horizontally into two equal layers. Place the bottom layer on a serving plate and spread half of the berry mixture evenly over the top. Dust the berries lightly with 0.125 cup powdered sugar (half of the total amount) to create a delicate, sweet contrast.
Place the top cake layer on the berries and dust the entire cake with the remaining 0.125 cup powdered sugar. This creates that classic angel food cake look while adding a subtle sweetness that complements the tart berries. Serve immediately or refrigerate for up to 2 hours before serving for the best texture.
Pro Tips For Making Angel Food Cake With Berries
- Whip Whites to Room Temp: Cold egg whites hide their full potential—let them sit in a bowl for 10 minutes before whipping. I used to skip this and ended up with stiff peaks that collapsed faster than a soufflé in a draft. Room-temperature whites whip up fluffier and hold their shape longer, especially when folded with flour later.
- Sift Flour Twice: Angel food cake relies on that light-as-air texture, so don’t cut corners here. Sift the cake flour before measuring, then sift it again right into the bowl with the sugar. That extra pass removes lumps and distributes starch evenly—no one wants a dense slice hiding under those berries.
- Stop Mixing Before "Done": Overmixing after folding in flour turns your cake into a gummy mess. Once the flour disappears and the batter looks like pale, shaggy clouds, stop. Use a spatula to gently swirl just until combined—no more. I learned this after a batch that tasted like glue, and now I resist the urge to "fix" the streaks.
- Bake Until Cool to Touch: The cake will sink if you pull it out too soon. Check doneness by pressing the center—it should spring back and feel cool to the touch. I used to rely on the toothpick test alone and ended up with a sad, dense middle. A few extra minutes in the oven (covered with foil if needed) guarantees a proper rise.
Pro cooking tips for perfect results
Egg White Mastery
Room-temperature egg whites are non-negotiable for maximum volume—pop them out of the fridge 30 minutes before whipping. I use a KitchenAid stand mixer with the whisk attachment because it creates a more stable meringue than hand mixers.
For extra insurance, add the cream of tartar first—it stabilizes the whites and prevents deflation during baking. 🥚
Pro tip: Tap your mixing bowl gently on the counter before starting to remove any air bubbles trapped in the egg whites. This small step prevents weak spots in your cake. Also, avoid greasing your mixing tools—even a trace of fat can prevent stiff peaks from forming.
Sugar Addition Technique
Adding granulated sugar too quickly creates grainy meringue, so use a fine-mesh sieve to sift it in while mixing on medium-high speed. I like to pause the mixer every 30 seconds to scrape the sides and bottom with a rubber spatula—this ensures even incorporation and prevents sugar from clumping.
Your meringue is ready when the bowl feels cool to the touch and the peaks hold their shape when you lift the whisk. For visual confirmation, tilt the bowl—if the meringue holds without sliding, it's perfect. Overmixing beyond this point can make the cake dense.
Flour Folding Secrets
Fold in the cake flour in three additions using a spatula in a "J" motion from the bottom up. This technique incorporates air while minimizing deflation. I've found that using a lightweight metal spatula works better than plastic—it's less likely to drag through the delicate meringue.
Stop folding when you see no more white streaks, but don't overmix. The batter should look like a thick, fluffy cloud. If you're unsure, err on the side of underfolding—you can always mix a little more, but you can't un-deflate the batter.
Berry Maceration Tricks
For the berries, I recommend using a fine-mesh strainer to drain excess liquid after macerating. Reserve 2 tablespoons of the juices to brush between cake layers—this adds moisture and enhances flavor. The lemon juice brightens the berries while preventing browning during assembly.
For extra vibrancy, toss the berries with 1 tsp honey instead of sugar if you prefer a more natural sweetness. I also like to add a pinch of Tajín seasoning for a subtle lime-zest kick that pairs beautifully with strawberries.
Cake Cooling Protocol
Never rush cooling! Let the cake sit in the pan for 10 minutes before inverting—this prevents collapse. I use a pizza peel lined with parchment paper to carefully flip the cake onto a wire rack. Gently tap the pan to loosen any stuck edges before releasing.
For even cooling, I place the cake on a rack over a baking sheet to catch any crumbs. This also helps prevent sogginess when assembling. The cake should be completely cool (about 1 hour total) before slicing to ensure clean layers.
Layering Like a Pro
Use a serrated knife to slice the cake horizontally—this gives you cleaner edges than a regular knife. For presentation, I arrange the berries in concentric circles on the bottom layer before adding the top layer. This creates a stunning visual effect when dusted with powdered sugar.
For extra flair, pipe a border of whipped cream around the edges before dusting with powdered sugar. This adds height and makes the cake look even more impressive. Serve immediately for the best texture—angel food cake is at its peak freshness right after assembly.
Nutrition facts
Frequently asked questions
Can I substitute all-purpose flour for cake flour in this recipe?
You can use all-purpose flour in a pinch, but reduce it by 2 tablespoons per cup to mimic cake flour's lower protein content. The texture won't be as tender or light, but it'll still work. For best results, use cake flour—it's what gives angel food cake that signature delicate crumb.
What's the best way to store leftover angel food cake with berries?
Store the cake in an airtight container at room temperature for up to 3 days. For longer storage, slice and freeze between parchment paper for 3 months. Keep the berries separate until serving to prevent sogginess. Refrigerate assembled cake for no longer than 2 hours before serving.
Why did my angel food cake collapse after baking? Collapse usually happens when egg whites aren't whipped to stiff peaks or the cake cools too quickly.
Can I make this cake without fresh berries?
Use frozen berries (thawed and drained) or high-quality jam for the filling. For a different texture, try a cooked berry compote made with 1 cup berries + 1 tbsp sugar + 1 tsp lemon juice, simmered until thickened. This works especially well with raspberries or blackberries.
How do I make this cake gluten-free?
Replace the cake flour with a 1:1 gluten-free flour blend (like Bob's Red Mill 1-to-1) plus ½ tsp xanthan gum per cup. Add 1 extra egg white to compensate for the lack of gluten structure. Note that the texture will be slightly denser than traditional angel food cake.