
Desserts
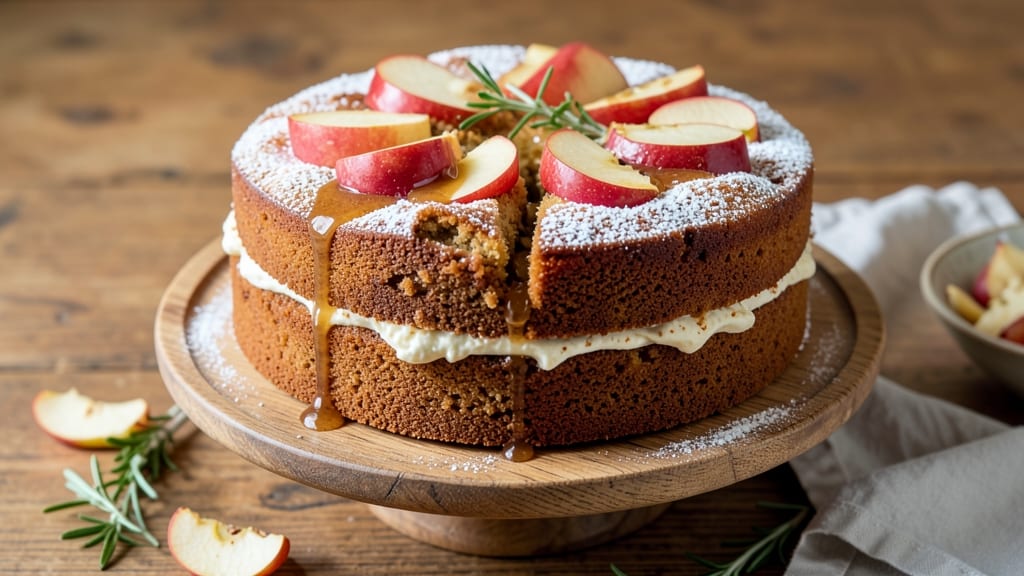
This American apple cake recipe delivers all the cozy comfort of a classic dessert with a twist—juicy apple filling baked right into a spiced cake in just one bowl. 🍏 The secret lies in tender apples folded into a moist batter, creating layers of flavor without the fuss of pie crusts.
I've perfected this version to stay tender while developing that signature caramelized apple aroma that fills your kitchen.
The beauty of this recipe is its simplicity: no fancy techniques, just a few pantry staples and a single mixing bowl. Warm spices like cinnamon and nutmeg infuse every bite, while the apples release their natural juices during baking, keeping the cake moist for days.
It's the kind of dessert that feels like a hug—perfect for family gatherings, holiday tables, or a quiet afternoon treat.
What you'll end up with is a cake with a golden, slightly cracked top (that's the good kind) and a texture that's perfectly balanced—tender yet sturdy enough to slice cleanly. The apples remain juicy and sweet, not mushy, thanks to a clever baking technique that preserves their natural goodness.
Serve it warm with a dusting of powdered sugar or a drizzle of caramel for that extra touch of indulgence.
This recipe scales beautifully for crowds, and the leftovers reheat wonderfully—ideal for meal prep or gifting. Whether you're a seasoned baker or just starting out, the straightforward steps and foolproof method ensure success every time. Let's get baking!
Ingredients for american apple cake
Cozy pantry staples meet juicy apples in this one-bowl wonder—no fancy tools, just pure comfort.
| Ingredient | Amount | Notes |
|---|---|---|
| All-Purpose Flour 🌾 | 2 ½ cups | Sifted for light texture |
| Granulated Sugar 🍚 | 1 ½ cups | White or light brown |
| Packed Brown Sugar 🍚 | ½ cup | Lightly packed |
| Unsalted Butter 🧈 | 1 cup | Cold, cubed for creaming |
| Large Eggs 🥚 | 2 whole | Room temperature |
| Vanilla Extract 🌿 | 1 tbsp | Pure vanilla preferred |
| Ground Cinnamon 🌶️ | 2 tsp | Freshly ground if possible |
| Ground Nutmeg 🌶️ | ½ tsp | Freshly grated preferred |
| Baking Soda 🧂 | 1 tsp | Pure baking soda |
| Salt 🧂 | ½ tsp | Fine sea salt |
| Honeycrisp Apples 🍏 | 4 medium | Peeled, cored, sliced |
| Lemon Juice 🍋 | 1 tbsp | Freshly squeezed |
| Powdered Sugar 🍚 | ¼ cup | For dusting |
The apples make or break this cake. Honeycrisp stays juicy while baking, but Granny Smith or Fuji work too—just avoid mealy varieties like Red Delicious. Slice them uniformly (about 1/4-inch thick) so they bake evenly. Trader Joe's or local orchards are great sources for fresh, firm fruit. If using frozen apples, thaw and pat dry first—they'll release more juice during baking. The spices? Penzeys or bulk bins for the freshest ground cinnamon and nutmeg, but regular grocery store jars work fine too.
No vanilla extract? Vanilla bean paste or even vanilla sugar (use half the amount) gets you close. Short on apples? Substitute with canned apple pie filling (drained) but add 1 tbsp flour to thicken. The brown sugar can be swapped for white sugar if you're out, though it'll be slightly less moist. For extra richness, add 1 tbsp of apple cider to the batter. And if your butter isn't cold? Microwave it for 40 seconds to just soften—don't melt it completely. The baking soda and salt are non-negotiable though; they balance the sweetness and keep the cake tender.
This cake keeps beautifully—3-4 days at room temperature wrapped in foil, or 1 week in the fridge. For longer storage, freeze slices wrapped individually for up to 3 months. Reheat in the oven at 300°F for 10 minutes to restore that warm, spiced aroma. I always bake an extra pan—it reheats perfectly for breakfast or dessert. The powdered sugar dusting? Save some for garnish—it makes everything look festive.
Why You'll Love This Recipe
- No-Fuss Mixing: I swear by the creamy butter-and-sugar combo here—just cream, dump, fold. No food processor, no whisking until your arm gives out. The brown sugar keeps things tender, and the eggs bind it all together without fuss.
- Spiced Comfort: That caramelized sugar crust? Chef’s kiss. The brown sugar and butter create a sticky, buttery top that’s practically a dessert all on its own. Honestly, I’ve been known to eat a slice straight from the pan.
- Weekend or Weeknight: Slice it warm for breakfast with coffee, pack it for lunch, or serve it at a picnic. The apples keep it moist for days, and the neutral flavor means it pairs with anything—peanut butter, whipped cream, or even a sprinkle of cinnamon.
- Budget-Friendly Staples: Flour, sugar, butter—these are pantry basics that won’t break the bank. I’ve made this cake for birthdays, potlucks, and even just because, and it’s always the first to disappear. Leftovers? Rare, but when they happen, they’re just as good reheated.
Step-by-step instructions for American apple cake
This one-bowl method delivers a moist, spiced cake with juicy apple filling baked right in.
👨🍳 Step 1: Cream Butter and Sugars Together
In a large mixing bowl, combine the 1 cup unsalted butter (cold and cubed) with the 1.5 cups granulated sugar and 0.5 cup packed brown sugar. Using an electric mixer on medium speed, beat for 3-4 minutes until light and fluffy. You'll see the mixture nearly double in volume and turn pale.
This creaming process incorporates air into the butter, which creates that signature tender crumb. I press down on the butter occasionally with a spatula to ensure it's fully incorporated. If the mixture feels too warm, chill the bowl in the freezer for 5 minutes—we want the butter to stay cold for proper texture.
👨🍳 Step 2: Add Eggs and Wet Ingredients
Add the 2 whole large eggs one at a time, mixing well after each addition. Then stir in the 1 tbsp vanilla extract and 1 tbsp lemon juice. The lemon juice brightens the apples and balances the sweetness, while the vanilla adds depth to the spice profile.
Next, whisk together the 2.5 cups all-purpose flour, 2 tsp ground cinnamon, 0.5 tsp ground nutmeg, 1 tsp baking soda, and 0.5 tsp salt in a separate bowl. Sift the dry ingredients directly into the wet mixture—this prevents lumps and ensures even distribution of the spices.
🍳 Step 3: Fold in Apples and Mix Just Until Combined
Peel, core, and slice the 4 medium honeycrisp apples into ¼-inch thick slices. Toss them with the 0.25 cup powdered sugar (this prevents browning) and fold half of them into the batter. The remaining apples will be layered on top later.
Using a spatula, gently fold the apple slices into the batter until just combined—don't overmix or the cake will be dense. The apples should be evenly distributed but still visible throughout. Here's where it gets fun: the apples will release juice as they bake, creating that signature juicy filling.
🔥 Step 4: Bake Until Golden and Juices Flow
Preheat your oven to 350°F and grease a 9-inch round cake pan. Pour the batter into the prepared pan, then arrange the remaining apple slices in a circular pattern on top. Bake for 50-55 minutes until a toothpick inserted in the center comes out clean and the top is golden brown.
I always check the cake at the 45-minute mark—the apples should be tender but still holding their shape. If the top browns too quickly, tent the pan with foil. The cake is done when the edges pull away slightly from the pan and the juices run clear when you pierce the center.
⏰ Step 5: Cool and Serve Warm
Let the cake cool in the pan for 15 minutes, then transfer to a wire rack to cool completely. The center should still be warm when you serve it—this is when the cake is at its juiciest. Dust the top with an additional sprinkle of powdered sugar for a classic finish.
Slice into wedges and serve warm with a scoop of vanilla ice cream or a dollop of whipped cream. The warm spices will mingle with the melted butter and juicy apples, creating a perfect balance of sweet, spiced, and tangy flavors. This cake tastes even better the next day when the flavors have fully melded!
Pro Tips For Making American Apple Cake
- Cream Butter & Sugar Slowly: I learned this the hard way—dumping cold butter into sugar and whipping it at high speed just makes a greasy mess. Instead, let the butter soften slightly (not melted) first, then mix it with the sugars on medium speed for 2-3 minutes until it’s pale and fluffy. That’s when the cake’s texture actually improves.
- Use Room-Temp Eggs: Cold eggs from the fridge will curdle your butter mixture and leave pockets of dryness in the cake. Take them out 30 minutes before mixing—yes, even if you’re impatient like me. Warm eggs blend smoother and help the batter hold together better.
- Don’t Overmix the Batter: Once you fold in the apples, stop stirring the second everything’s just combined. Overmixing develops gluten and turns your tender cake into a dense brick. A few lumps? Doesn’t matter—it’ll bake out fine.
- Bake Until Internal Temp Hits 205°F: The cake might look done at 190°F, but pull it out at 205°F for a properly set crumb. Use an instant-read thermometer in the center—if it’s under, give it 5 more minutes. Trust me, your slice won’t fall apart later.
Make-ahead tips for this dish
Prep Ahead for Stress-Free Baking
Slice and toss your apples with powdered sugar up to 24 hours ahead—they’ll stay fresh in an airtight container in the fridge. I always do this the night before so I can wake up to prepped ingredients.
The apples will release minimal juice overnight, keeping them crisp for baking. Store the dry ingredients (flour, sugar, spices) in separate jars for up to 1 month to maintain freshness. 🍏
Freezer-Friendly Mixing Bowl
Mix the entire batter (except apples) up to 3 days ahead and store it in an airtight container in the fridge. When ready to bake, fold in the apples and proceed with the recipe.
The batter keeps its structure beautifully, though the apples should be added fresh for the best texture. For longer storage, freeze the batter in a single layer on a tray, then transfer to a freezer bag for up to 3 months. Thaw overnight in the fridge before baking. ❄️
Cake Pan Prep Shortcut
Grease your 9-inch round cake pan with butter and line the bottom with parchment paper for foolproof release. I like to use a silicone baking mat instead—it eliminates greasing entirely and prevents sticking.
If you're short on time, use a nonstick spray like Baking King nonstick spray. Always preheat your oven for 15 minutes before baking to ensure even heat distribution. 🔥
Portioning for Crowds
Double the recipe and bake in two 9-inch pans for a crowd, or use a 10-inch pan for a single-layer cake. For easy serving, wrap individual slices in parchment paper and tie with twine before gifting.
I often bake this cake for holiday gatherings—it reheats beautifully in the oven at 300°F for 10 minutes to restore its warmth. Store leftovers in an airtight container with a slice of bread to absorb excess moisture. 💫
Make-Ahead Glaze Option
Prepare a simple glaze by mixing ½ cup powdered sugar with 2 tbsp milk and 1 tsp vanilla extract. Store it in a small jar in the fridge for up to 1 week. Drizzle over cooled cake slices just before serving for a professional finish.
For extra flair, add ¼ tsp cinnamon to the glaze. This glaze also works as a filling for stuffed apple slices—just pipe it into the center before baking. ✨
Nutrition facts
Frequently asked questions
Can I use any type of apple for this cake?
While Honeycrisp apples are ideal for their juicy texture, you can use Granny Smith (for tartness) or Fuji (for sweetness). Avoid mealy varieties like Red Delicious or Gala—they won't hold up well during baking. If using tart apples, add an extra 1 tbsp sugar to the batter to balance the flavor.
Why does my cake turn out dry?
Overbaking is the most common culprit—check your cake at 45 minutes and remove it when a toothpick comes out clean. Another reason could be overmixing the batter or using too much flour. For extra moisture, try replacing 1 tbsp flour with 1 tbsp cornstarch or adding 2 tbsp sour cream to the batter.
Can I make this cake gluten-free?
Yes! Swap the all-purpose flour for a 1:1 gluten-free baking flour blend like Bob's Red Mill. You may need to add ½ tsp xanthan gum if it's not included in your blend. For best results, let the batter rest for 10 minutes before baking to help the gluten-free flour hydrate properly. The texture will be slightly denser but still delicious.
How do I store leftovers?
Keep the cake wrapped in an airtight container at room temperature for 3-4 days. For longer storage, refrigerate for up to 1 week or freeze slices for 3 months. To reheat, warm in the oven at 300°F for 10 minutes or microwave for 15-20 seconds. The flavors actually improve overnight!
What's the best way to serve this cake?
Warm slices pair perfectly with vanilla ice cream, whipped cream, or caramel sauce. For a rustic touch, dust with powdered sugar and add a sprinkle of toasted pecans. Serve with a cup of chai tea or hot apple cider for the ultimate cozy dessert experience.