
Desserts
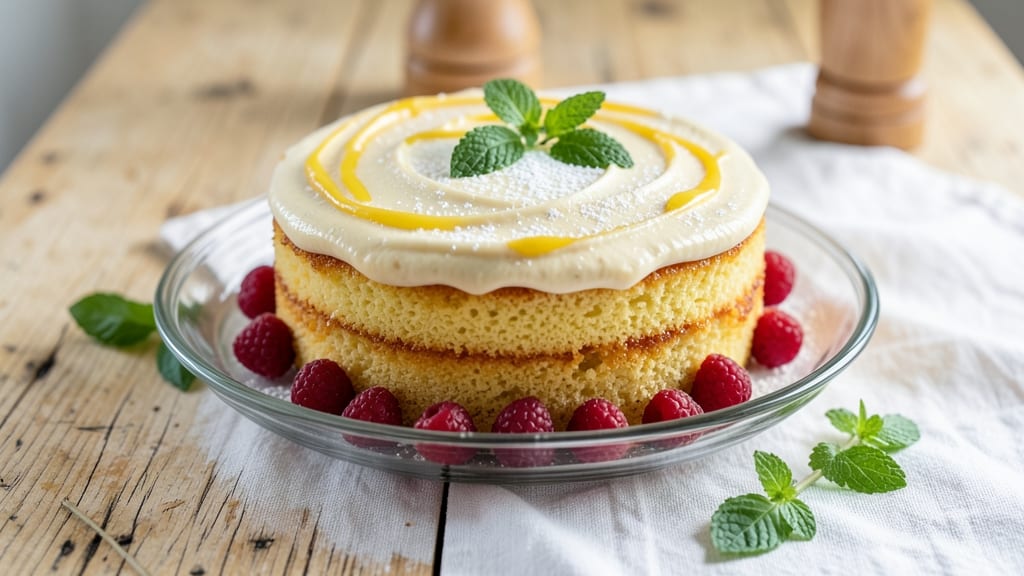
This amazing yellow cake recipe delivers layers of pure vanilla bliss that stay moist for days—no dry crumbs in sight. 💛 I've baked countless cakes, and the secret lies in the butter-to-flour ratio and a simple trick with sour cream that keeps every slice tender.
The vanilla frosting? Rich, smooth, and perfectly balanced so it doesn't overpower the cake's delicate sweetness.
What makes this recipe special is how foolproof it is—no fancy equipment, just basic kitchen tools and 30 minutes of active time. The cake bakes up with a golden top and edges that stay soft, while the frosting comes together in minutes with just powdered sugar, butter, and vanilla.
I promise you won't believe how easy it is to achieve bakery-quality results at home.
Imagine pulling a perfectly risen cake from the oven with edges that just begin to pull away, then spreading that velvety vanilla frosting that melts into every layer.
Each bite is moist, flavorful, and perfectly sweet—not too rich, not too light. This is the kind of cake that disappears faster than you can say "second slice."
The best part? It's perfect for birthdays, potlucks, or even a cozy Sunday dessert. Let's get baking—your taste buds (and guests) will thank you.
Ingredients for amazing yellow cake
Here's what transforms simple pantry staples into bakery-style yellow cake magic.
| Ingredient | Amount | Notes |
|---|---|---|
| All-Purpose Flour 🌾 | 2 ½ cups | Sifted for light texture |
| Unsalted Butter 🧈 | 1 cup | Room temperature, full-fat preferred |
| Granulated Sugar 🍚 | 2 cups | White or light brown |
| Sour Cream 🥛 | ½ cup | Full-fat for moisture |
| Pure Vanilla Extract 🌿 | 2 tsp | Bottled or seedless preferred |
| Baking Powder 🍞 | 2 tsp | Freshly opened package |
| Salt 🧂 | ½ tsp | Fine sea salt preferred |
| Large Eggs 🥚 | 2 whole | Room temperature |
| Milk 🥛 | ½ cup | Whole milk preferred |
| Powdered Sugar 🍚 | 4 cups | Sifted for smooth frosting |
| Pure Vanilla Extract 🌿 | 2 tsp | Same as cake, for frosting |
| Unsalted Butter 🧈 | 1 cup | Room temperature, for frosting |
The butter and sour cream are the real MVPs here. Use European-style butter if you can find it—it's richer and gives a better texture. Kroger's or Whole Foods usually carry it. If you're short on sour cream, Greek yogurt works in a pinch (same amount), but trust me on the full-fat version. The vanilla extract? Bottled is fine, but if you've got vanilla beans, scrape those seeds in for extra depth. And whatever you do, don't skip sifting the flour—it makes all the difference in that tender crumb.
No powdered sugar? Confectioners' sugar from the store works, but if you're feeling fancy, blend granulated sugar in a food processor for a second. The frosting butter needs to be room temp—microwave it for 40 seconds if it's cold. For the cake, if you're out of baking powder, baking soda plus cream of tartar (half the amount) is a solid swap. And if you've got leftover frosting, store it between parchment paper to keep it from drying out.
This cake keeps beautifully—3 days at room temp covered loosely, or 1 week in the fridge wrapped tight. The frosting? 3 days max unless you refrigerate it. I always double the frosting because it disappears faster than the cake. Freeze the unfrosted cake for up to 3 months—just let it come to room temp before frosting. And if you're making it ahead? Frost it the night before so flavors meld perfectly.
Why You'll Love This Recipe
- No Mixer Needed: I swear by this recipe when my mixer’s on the fritz—just cream the butter and sugar by hand, fold in the sour cream, and you’re golden. The sour cream keeps it moist without overworking the batter.
- Buttery Vanilla Bliss: That first bite? Rich, tender crumb with a whisper of vanilla that lingers. The butter’s not an afterthought here—it’s the star, and the sour cream adds this subtle tang that makes it ridiculously good.
- Birthday or Breakfast: Slice it for a celebration, cube it for pancakes, or frost it for a weekday treat. Honestly, I’ve even used it as a pie crust substitute when I’m lazy. It’s that adaptable.
- Leftovers That Last: This cake stays fresh for days, and slices reheat beautifully. Between us, I’ve had it cold the next morning with coffee—no one ever guesses it’s not a bakery buy. Budget-friendly? Absolutely.
Step-by-step instructions for perfectly moist yellow cake
Here's how to bake a yellow cake so tender it melts in your mouth—every time.
👨🍳 Step 1: Cream Butter and Sugar Until Fluffy
In a large mixing bowl, combine the 1 cup unsalted butter and 2 cups granulated sugar. Using an electric mixer on medium-high speed, beat for 3-5 minutes until the mixture is light, pale yellow, and nearly doubles in volume. You'll see ribbons form when you lift the beaters—this means proper air incorporation for that perfect cake texture.
I like to scrape down the sides every minute or so to ensure everything gets fully creamed. This step is crucial for creating a tender crumb rather than a dense one. If your butter isn't at room temperature, you'll struggle to get that light texture, so make sure it's soft enough to leave a slight indent when pressed.
👨🍳 Step 2: Add Eggs and Sour Cream for Extra Moisture
Add the 2 whole large eggs, one at a time, mixing well after each addition. Then stir in the 0.5 cup sour cream and 2 teaspoons pure vanilla extract. The mixture should be smooth and slightly thickened. The sour cream adds that signature moistness that makes this cake stand out—don't skip this step!
Here's the thing—adding the eggs and sour cream gradually prevents the batter from becoming too runny. If you add them all at once, you might end up with a batter that's too thin, leading to a cake that's more cakey than moist. Mix just until combined after each addition to maintain that perfect consistency.
👨🍳 Step 3: Combine Dry Ingredients for Light Layers
In a separate bowl, whisk together the 2.5 cups all-purpose flour, 2 teaspoons baking powder, 0.5 teaspoon salt, and 0.5 cup milk. Sift the flour first to prevent lumps—this ensures your cake will have that light, airy texture we're after. Then gently fold this dry mixture into the wet ingredients using a spatula, mixing just until combined.
I know it seems weird, but don't overmix here. You want to see a few flour streaks remaining—that's normal and actually prevents a tough cake. Overmixing develops gluten, which makes the cake dense. Mix until the batter is smooth and just combined, then stop. The batter should be thick but pourable.
🔥 Step 4: Bake in Prepared Pans for Even Cooking
Preheat your oven to 350°F and grease two 9-inch round cake pans with butter or baking spray, then line the bottoms with parchment paper. Divide the batter evenly between the pans and smooth the tops. Bake for 25-30 minutes or until a toothpick inserted in the center comes out clean.
This is the moment that matters: don't open the oven door before the 20-minute mark, or you'll cause the cakes to sink. The edges should be golden brown while the centers remain slightly springy. If your oven runs hot, start checking at the 20-minute mark. Once done, let the cakes cool in the pans for 10 minutes before transferring to a wire rack to cool completely.
🍳 Step 5: Make Vanilla Frosting to Tie It All Together
While the cakes cool, make the frosting by beating the 1 cup unsalted butter until creamy, then gradually add the 4 cups powdered sugar and 2 teaspoons vanilla extract, mixing on low speed until smooth. Add the 0.5 cup milk gradually to reach your desired consistency—it should be thick enough to hold peaks but still spreadable.
This frosting is where the magic happens. The powdered sugar gives that classic vanilla frosting texture, while the butter keeps it rich and flavorful. If it's too thick, add a splash more milk; if too thin, add a bit more powdered sugar. Spread the frosting between the cooled cake layers first, then cover the entire cake. The frosting should be smooth and even, creating that perfect cake presentation.
Pro Tips For Making Amazing Yellow Cake
- Cream Butter Properly: Whip the butter and sugar until light and fluffy—think about 3-5 minutes with a mixer—so you get that airy texture. I used to rush this, and the cake came out dense. Trust me, the extra time here makes all the difference in the final crumb.
- Sift That Flour: Don’t just scoop flour from the bag—sift it first, especially if your recipe calls for more than 2 cups. This removes lumps and aerates the batter, giving you a smoother texture. (Yes, even if you’re impatient like me.)
- Room-Temp Sour Cream: Take the sour cream out of the fridge 30 minutes before using it—just long enough to soften. Cold sour cream curdles when mixed with warm butter, and nobody wants a lumpy cake. A quick fix that actually changes the outcome.
- Check for Doneness Early: Start checking for doneness at 25 minutes, not the recipe’s full time. The cake pulls away from the edges but still jiggles slightly in the center—that’s perfect. Overbaking turns yellow cake dry, and we’re aiming for moist, not rubbery.
Make-ahead tips for this dish
Prep Ahead Strategy
Make the cake batter up to 24 hours in advance and store it in an airtight container in the fridge. The flavors deepen overnight, and the batter will be perfectly chilled when you're ready to bake.
I always prep mine the night before—it saves time on baking day and guarantees perfect results. 💫
Frosting Prep
Prepare the frosting 1 day ahead and store it between two sheets of parchment paper in an airtight container. This prevents it from drying out, and the texture remains smooth and spreadable. When you're ready to assemble, simply whip it back up for 1-2 minutes to restore its fluffiness.
Layer Assembly
Frost the cake the night before you plan to serve it. Chilling for at least 4 hours (or overnight) allows the frosting to set completely, creating clean layers and preventing any messy crumbs. This is my secret for restaurant-quality presentation without the stress. ✨
Storage Tips
Wrap the fully frosted cake in plastic wrap and store it at room temperature for up to 3 days. For longer storage, refrigerate it for up to 1 week.
To serve, let it sit at room temperature for 30 minutes before slicing—this makes the frosting more spreadable and the cake easier to cut.
Freezing Unfrosted Cake
Unfrosted cake layers freeze beautifully for up to 3 months. Wrap each layer individually in plastic wrap, then place them in a freezer bag with all the air squeezed out.
Thaw overnight in the fridge before frosting and assembling. This is perfect for birthdays you know are coming weeks in advance!
Make-Ahead Mistakes
Avoid these common pitfalls: Don't freeze the frosted cake—the frosting will turn grainy. Don't skip the parchment paper when storing frosting, or it'll dry out. And never microwave the cake to speed up thawing—it'll ruin the texture. Trust the process, and your cake will always turn out perfect. 💪
Nutrition facts
Frequently asked questions
Why does your yellow cake recipe use sour cream?
The sour cream is the secret weapon for that ultra-moist texture! It adds richness and tenderness that regular milk can't match. The acidity in sour cream also helps activate the baking powder for a lighter rise. For a quick substitute, use Greek yogurt in the same amount—just make sure it's full-fat for best results.
Can I make this cake in a different pan size?
Yes, but you'll need to adjust the baking time. For one 9-inch round pan, bake for 30-35 minutes instead of 25-30 minutes. If using a 9x13-inch pan, reduce the batter by half and bake for 30-35 minutes. Always check with a toothpick—it should come out clean when done.
How do I fix a cake that's cracked on top?
Cracked tops usually mean the cake baked too long or the oven was too hot. Next time, check for doneness at 25 minutes (for two 9-inch pans). For this cake, gently brush the cracks with simple syrup (equal parts sugar and water, heated until dissolved) and let it sit for 10 minutes before frosting—it'll blend right in!
What's the best way to level the cake layers?
Use a serrated knife and a leveling guide (or even a ruler) to create perfectly even layers. Run the knife over the cake at a slight angle, then check the height against your guide. For extra precision, dip the knife in hot water between cuts to keep it sharp. Uneven layers = messy frosting!
Can I use oil instead of butter in this recipe?
You can try, but the texture will be different. Oil makes cakes denser and more cakey. If you must substitute, use ⅔ cup vegetable oil (instead of butter) and reduce the milk by 1 tablespoon. The cake will still be delicious, just not as tender. For best results, stick with the butter—it's worth the effort!