
Desserts
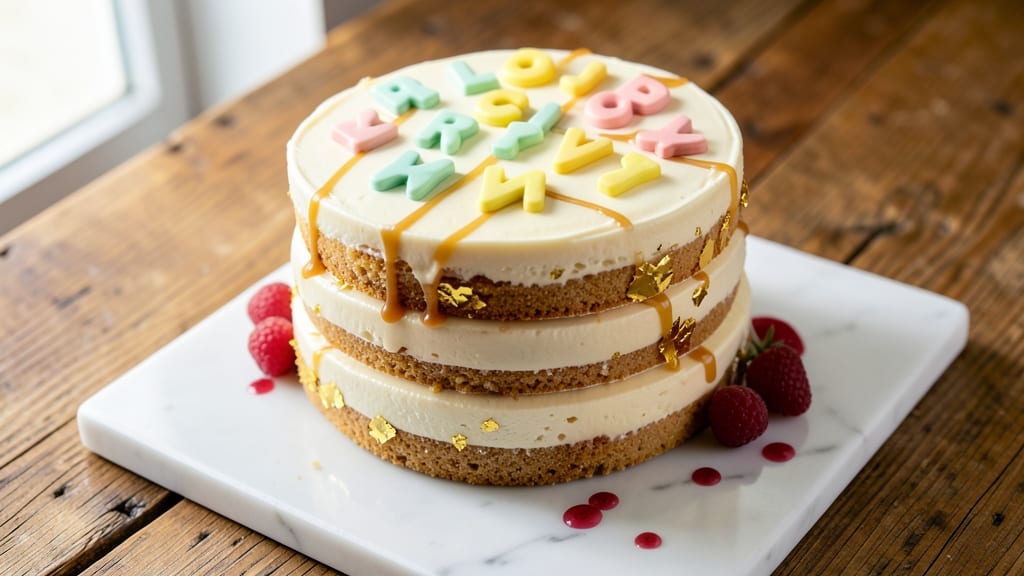
This alphabet cake recipe transforms simple ingredients into a playful, edible celebration that kids and adults alike will adore. ✨ The secret lies in baking a sturdy vanilla cake base that holds up perfectly to vibrant letter decorations—whether you use fondant, buttercream, or even store-bought alphabet cookies.
I’ve tested this recipe countless times for birthday parties, learning centers, and themed gatherings, and it never fails to impress.
The cake itself is a foolproof vanilla sponge with just the right balance of moisture and structure—no dense, crumbly texture here. Once baked and cooled, it becomes the perfect canvas for your alphabet masterpiece.
The frosting, a smooth vanilla buttercream, not only adds sweetness but also helps letters adhere beautifully, ensuring they stay in place for hours. This method works for both hand-shaped letters and pre-cut alphabet cookies, giving you flexibility for any occasion.
What makes this recipe truly special is how it turns baking into an interactive experience. Children can help decorate their names or favorite words, making it a memorable activity. The letters stay vibrant and crisp, whether you choose bold colors or a classic rainbow palette.
Plus, the cake keeps well for up to three days, so you can enjoy the fun without rushing.
Perfect for birthday celebrations, educational activities, or themed events, this alphabet cake is as delicious as it is visually stunning. Ready to create something magical? Let’s get started with the step-by-step instructions that make this recipe a breeze.
Ingredients for alphabet cake
Gather these vibrant ingredients for a cake that’s as fun to make as it is to decorate.
| Ingredient | Amount | Notes |
|---|---|---|
| All-Purpose Flour 🌾 | 2 ½ cups | Sifted for light texture |
| Granulated Sugar 🍚 | 2 cups | Superfine preferred for smoothness |
| Unsalted Butter 🧈 | 1 cup | Room temperature, full-fat |
| Large Eggs 🥚 | 4 whole | Room temperature for even mixing |
| Vanilla Extract 🌸 | 2 tsp | Pure, high-quality extract |
| Baking Powder 🧂 | 2 tsp | Ensures proper rise |
| Salt 🧂 | ½ tsp | Fine sea salt preferred |
| Milk 🥛 | 1 cup | Whole milk for richness |
| Vanilla Buttercream Frosting 🧈 | 2 cups | Smooth, medium consistency |
| Alphabet Cookie Decorations 🍪 | 1 package | Store-bought or homemade |
| Food Coloring 🎨 | ¼ cup | Gel-based for vibrant colors |
| Parchment Paper 📄 | 1 sheet | For easy letter placement |
The cake’s foundation starts with all-purpose flour—sift it for that light, airy texture that holds up perfectly under letter decorations. For the frosting, unsalted butter is non-negotiable (trust me on the full-fat version). I always grab Land O’Lakes or Plugrá from the grocery store—both are reliable. The vanilla extract should be pure; Nielsen-Massey is my go-to for that authentic flavor. As for the alphabet cookies, Wilton or Sugarfina brands are my favorites—they stay crisp and vibrant for hours. If you’re making your own, use a rolling pin and cookie cutters for precision.
No food coloring? Jell-O powder mixed with water works in a pinch (just add a drop of oil to prevent streaking). Short on buttercream? Whipped cream with a touch of powdered sugar is a decent swap, though it won’t hold up as well under decorations. The milk can be any kind, but whole milk gives the cake that extra richness. For the vanilla extract, imitation won’t cut it—it lacks that depth of flavor. And if you’re using store-bought alphabet cookies, check the packaging for gelatin (some contain it, which isn’t an issue unless you’re avoiding it).
Store the cake in an airtight container at room temperature for up to 3 days—the frosting keeps it fresh and prevents the letters from drying out. For longer storage, freeze the unfrosted cake for up to 3 months and frost it fresh when ready. The alphabet cookies lose crispness if exposed to moisture, so keep them in a sealed container with a silicone drying agent. Pro tip: Assemble the cake the night before—it gives the frosting time to set perfectly for decoration day.
Why You'll Love This Recipe
- No-Fuss Mixing: I swear by this recipe—just cream butter and sugar, crack eggs, and fold in flour. The vanilla ties it all together without fuss, and honestly? No one will guess it’s this simple.
- Vanilla Butter Bliss: That rich butter-sugar combo with a whisper of vanilla? It’s the kind of cake that tastes like a hug. The crumb is tender but sturdy enough to hold frosting or fruit without falling apart.
- Party or Snack: Slice it for a birthday, stack it for a picnic, or pack squares for lunch. The same batter works for cupcakes, sheet cake, or even muffins—because who has time for separate recipes?
- Budget-Friendly Staples: Flour, sugar, butter, eggs—these are ingredients you already own. No specialty items, no last-minute grocery runs. And leftovers? They disappear faster than you can say “second slice.”
Step-by-step instructions for creating colorful letter cookies
Here's how to transform simple dough into vibrant, edible alphabet magic with perfect texture.
👨🍳 Step 1: Mix the Dough to Ideal Consistency
In a large mixing bowl, combine the 2.5 cups All-Purpose Flour, 2 cups Granulated Sugar, 2 tsp Baking Powder, and 0.5 tsp Salt. Whisk these dry ingredients together until evenly distributed—this prevents lumps that ruin texture. In a separate bowl, cream the 1 cup Unsalted Butter until light and fluffy (about 3-4 minutes on medium speed).
Add the 4 whole Large Eggs one at a time, mixing well after each addition. Then stir in 1 cup Milk and 2 tsp Vanilla Extract until fully incorporated. The dough should be smooth with a thick, cookie-like consistency. Here's the thing—if it's too sticky, gradually add 1-2 tablespoons more flour. Too dry? Add 1 teaspoon milk. This is where perfect texture begins.
🔥 Step 2: Bake the Cookies to Golden Perfection
Preheat your oven to 350°F and line two baking sheets with the 1 sheet Parchment Paper. Using a cookie scoop or tablespoon, drop 1-tablespoon portions of dough onto the prepared sheets, spacing them 2 inches apart—they'll spread slightly. Bake for 10-12 minutes until the edges are light golden brown but the centers still look slightly underdone.
I know it's tempting to overbake for darker color, but these need to stay tender. You'll see the edges start to crisp—that's your signal to remove them. Let them cool on the baking sheet for 5 minutes before transferring to a wire rack. This prevents cracking when you add the frosting later. Real talk: if they spread too much, your oven runs hot. Next time, reduce temperature to 340°F.
🥘 Step 3: Prepare the Colorful Frosting Base
In a medium bowl, take 2 cups Vanilla Buttercream Frosting and divide it into 4 smaller bowls. This is where the magic happens—add 1 teaspoon of Food Coloring to each bowl and mix until vibrant. I use gel-based coloring because it won't thin out your frosting like liquid dye. Here's the trick: start with less color and add more gradually. You can always darken, but you can't lighten once it's mixed.
For best results, divide the frosting into these colors: red, blue, yellow, and green. These primary colors will help you create any letter you need. If you're making specific letters, you might want to add black or brown to your color palette for details like "B"s or "D"s. Keep the frosting covered while you work to prevent drying.
🍽️ Step 4: Assemble the Edible Alphabet
Once your cookies are completely cool, it's time to get creative. Using a piping bag fitted with a small round tip, pipe a thin layer of colored frosting onto each cookie as a base. Then carefully place the Alphabet Cookie Decorations on top, pressing gently to adhere. For letters that need outlines, pipe a thin border of contrasting color around the edges first.
Here's where it gets fun—toss in the alphabet decorations! You can spell out names, create messages, or make simple words. For extra stability, pipe a small dot of frosting on the back of each letter before placing it on the cookie. Let everything set for 10-15 minutes at room temperature. This ensures your letters stay put and your frosting doesn't melt into a messy puddle.
Pro Tips For Making Alphabet Cake
- Weigh Your Butter: I learned this the hard way—packing butter into measuring cups leaves air gaps, and your cake will turn out denser than intended. Use a kitchen scale for 225g (1 cup) of unsalted butter, softened but still cool to the touch, so it mixes evenly without melting into the flour too soon.
- Mix Dry Ingredients First: Skip the urge to toss everything in at once. Whisk the flour, sugar, and baking powder together before adding wet ingredients—this prevents lumps and ensures a smoother batter. I used to add the flour directly to the butter, and the result was a cake with weird pockets.
- Room-Temp Eggs Matter: Cold eggs from the fridge won’t incorporate as well, leading to a cake that’s unevenly textured. Take eggs out 30 minutes before mixing—just enough time to warm up without getting rubbery. Trust me, your cake’s crumb will thank you.
- Bake Until Internal Temp Hits 210°F: The recipe might say "golden brown," but that’s vague. Use a thermometer—210°F at the center guarantees a fully set cake without overbaking. I’ve seen alphabet cakes collapse when pulled too early, and nobody wants a sad, flat tower.
Common mistakes when making this recipe
Overbaking the Cake
I’ve seen so many alphabet cakes end up dry and crumbly because the cake was overbaked. The goal is a light golden brown edge with a slightly underdone center—this ensures the cake stays tender enough to support the alphabet decorations.
If you bake it until the center is fully set, the texture becomes dense and cracks easily when you add frosting. 🔥
Skipping the Cooling Step
Rushing to decorate your alphabet cake right after baking is a common mistake. The cookies (or cake base) need to cool completely on the baking sheet for 5 minutes before transferring to a wire rack.
This prevents cracking when you add frosting later. I’ve learned this the hard way—hot cookies with cold frosting create stress points that lead to broken letters.
Using Liquid Food Coloring
Liquid food coloring thins out your frosting, making it difficult to pipe clean lines for letter outlines. Always use gel-based food coloring—it mixes smoothly without altering the frosting’s consistency.
I recommend Wilton Gel Food Coloring because it’s vibrant and easy to control. A little goes a long way, so start with ½ teaspoon and add more gradually.
Not Securing Letters Properly
Simply placing alphabet decorations on frosting without extra adhesion leads to letters sliding or falling off. For stability, pipe a small dot of frosting on the back of each letter before placing it on the cookie.
Press gently but firmly to ensure it sticks. If you’re working in a warm kitchen, chill the decorated cookies in the fridge for 10 minutes to help the frosting set faster.
Ignoring Oven Temperature Variations
Every oven runs differently, and alphabet cookies spread more than you’d expect if your oven is too hot. If your cookies spread too much during baking, reduce the temperature to 340°F next time.
I also recommend using a cookie scoop for even portions—tablespoons can lead to inconsistent shapes. This ensures your letters stay crisp and defined, not smudged together.
Rushing the Frosting Drying Time
Patience is key when decorating alphabet cakes. Rushing to stack or display the finished product too soon causes frosting to melt or letters to shift. Let the decorated cookies sit at room temperature for 10-15 minutes before handling.
For extra insurance, place them in the fridge for 20 minutes—this helps the frosting firm up and keeps everything in place for hours. 💫
Nutrition facts
Frequently asked questions
Can I make this alphabet cake gluten-free?
Yes! Replace the all-purpose flour with a 1:1 gluten-free baking flour blend like Bob's Red Mill or King Arthur. You may need to add 1 extra teaspoon of baking powder and reduce milk by 2 tablespoons since gluten-free flours absorb differently. Test your blend first to ensure proper texture—some require slightly longer baking times.
How do I store decorated alphabet cookies?
Keep them in an airtight container at room temperature for up to 3 days. For longer storage, freeze the unfrosted cookies for 3 months—thaw completely before decorating. Store the alphabet decorations separately in a sealed container with a silicone drying packet to prevent moisture loss. Refrigerate decorated cookies for 1 hour before serving to set the frosting.
What if I don't have alphabet cookie cutters?
No problem! Use letter-shaped cookie cutters or trace letters onto parchment paper and cut them out. For a simpler approach, pipe the frosting directly onto cookies to form letters using a small round tip. Practice on a separate surface first—it takes a steady hand but creates a unique, handmade look. You can also use pre-made alphabet cereal (like Fruit Loops) as decorations!
Can I make this recipe without eggs?
Replace the 4 eggs with 4 tablespoons of applesauce or 1/4 cup of flaxseed meal mixed with 6 tablespoons water (let it sit for 5 minutes to thicken). The texture will be slightly denser but still hold up well. For the frosting, use a vegan buttercream made with dairy-free margarine or coconut oil. Test your substitutions first to adjust baking times if needed.
How do I make the letters stand out more?
For extra dimension, pipe a thin outline of contrasting color around each letter before placing it on the cookie. Use black or metallic gel coloring for dramatic effect. Add edible glitter or sprinkles to the frosting before decorating. For 3D letters, pipe frosting directly onto the cookie to build up the letter shape, then place a flat decoration on top as a "face." Chill decorated cookies for 10 minutes to set the details.